
Ever since I figured out how to get a really nice emboss with my Silhouette Curio, I’ve been wanting to translate that process over to the Cricut. Let me just tell you it wasn’t easy. As soon as I got it working, DS3 changed everything and I had to start over. Ugg.
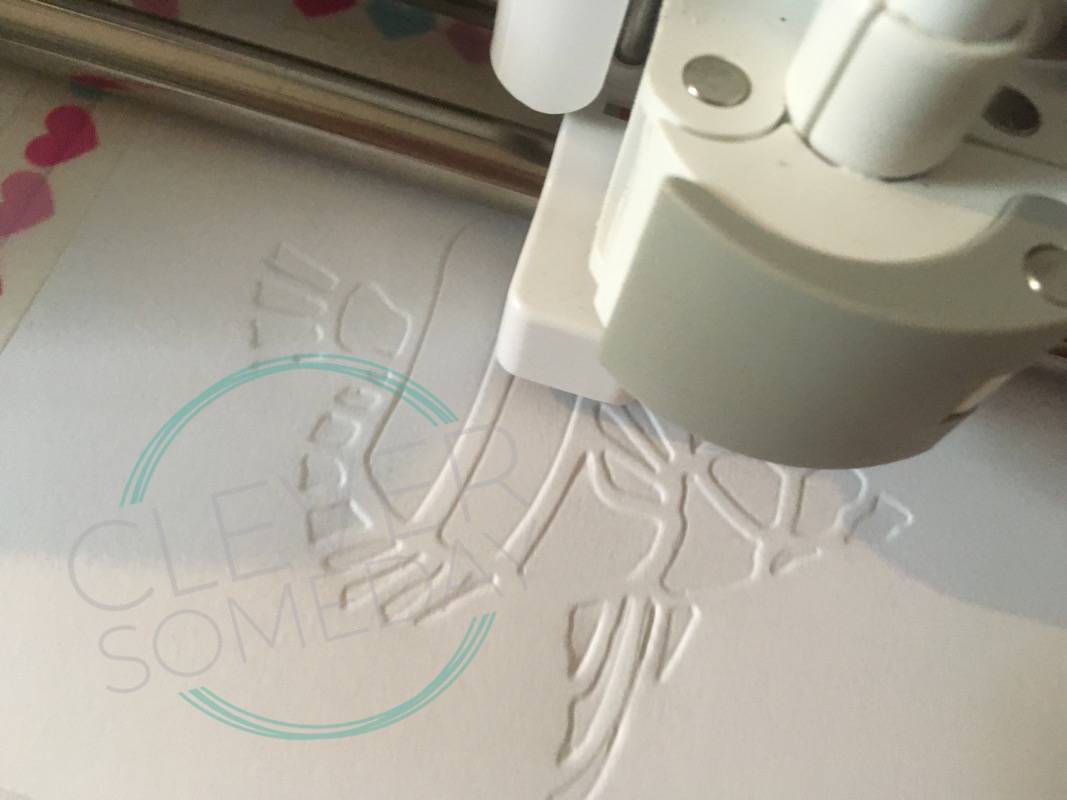
I finally got it, though and you aren’t going to believe how well it works and how great your projects will look. If you ever “dry embossed” with a brass stencil, a stylus and a light table, then you’ll understand what is involved here. We’re going to put a stencil under our paper and let the Explore do the embossing for us.
Since its kinda complicated, we’re going to have to do this in stages (I start getting anxious if my videos go over 10 minutes). So in this first installment, I’m going to show you the whole process on video and provide a file, as well as written instructions, if you want to walk through it yourself.
What you need:
– A Cricut Explore or Maker (some Cricut Explore Air 2’s have a scoring bug and won’t work. If you are an E2 owner with weak scoring pressure, please call support)
– Cricut Scoring Stylus
– A Cricut pen (optional, but simplifies things)
– heavy white matte cardstock that is both printable and cuttable (for the stencil). I am using Recollections 110lb/300 gsm card stock from Michaels, but this is too heavy for some printers, so use the heaviest card stock you can print on.
– media to emboss … I recommend Neenah 67 lb Exact Vellum Bristol, but any light to medium weight card stock will work. Cut it into 4 x 5-1/4″ rectangles for this demo (to fit an A2 card front)
(plain old 110 lb /200 gsm card stock from Walmart will work for both parts of this demo, but you might not get the crispest results possible)
My Design Space file– This link will open in Cricut Design Space on your computer (will not work from mobile devices). Click customize and save the file to your account.
I’m working on a tutorial for how to create your own embossing files. In the meantime I have prepared an infographic with the pertinent details for advanced users who don’t want to wait. This is going to require 3rd party software, unfortunately. Also hope to have some more files to share. Stay tuned.
Update: the video on preparing embossing files in SureCutsALot 4 is here!
In case you missed the link above, a printable PDF of the instructions is here.

Hi, where is link to fish? I cannot find it. Thanks
It is at the link that reads “My Design Space file” also link in video description and in PDF instructions. Will not open from a mobile device.
I am sorry but i cannot open the file. When i click on the link on my computer, nothing is there in Circut DS. Help
Thank you for reporting that. There seems to be a problem with DS at this time. I am able to get to the file when going through the Community link https://community.cricut.com/projects/project-detail/59f73ccb8b4cdc1985806520
This is genius! Thank you!!
Thank you so much for sharing this.
It had to be you!
This is beyond genius!!!
Thanks.
I’m new to all of this …. I was wondering if you need the scorning tool w/ the new Maker or not. I can’t find a complete answer. The one I saw said for Explorer but I also know they probably didn’t update the packaging yet.
Thanks.
Yes, if you want to score you need the Cricut Scoring Stylus. Its the same as for the Maker. The one I show in the video.
very clever!
Thank you! That was really cool.
Kathy
This is super, and thank you so much for bring this fantastic idea to our homes. Have a beautiful day.
Kay this is amazing! I have been wanting to do this for years thank you so much for this video!
How do you get the fish on the right side? That part I am not able to figure out.
You need 3rd party software for that because it requires an inset. Until I get a full tutorial completed, take a look at the infographic linked above for the technical details.
This is exactly what I have been looking for! I love your direct teaching style and the way you think outside the box. I am never satisfied with what the Cricut can do (although with the Maker it is rather impressive) I want to know what ELSE it can do! Thank you so much for sharing!
P.S. What is the 3rd party software?
Easiest in SCAL4, but doable in Inkscape and other vector editing programs.
I have played with Inkscape. It can do anything – which means relative newbies are lost all the time :). You explained how to use SureCutsALot. shorthand hints on what commands to use in Inkscape would be invaluable.
Also: that seahorse is awesome! Have graphics for that?
Thanks,
M
Hi Marianne,
There are 2 small hurdles to do this in Inkscape. The first is that doing an inset of a specific distance is not trivial in Inkscape. The default is pretty close and may work fine, or you can change the default or edit the svg code. The second hurdle is that SVGs do not come in to DS at the proper size. This is remedied, as I mention in the video, by resizing the SVG to its original height and width after you have inserted it in DS. The seahorse is from this wonderful dingbat font called HFF Aqua Stencil, which is a great source of images for this technique. https://www.dafont.com/hff-aqua-stencil.font
I’ve been trying …
First, I tried using the font and adding it to Inkscape as text. For some reason, the seahorse I am trying gets decapitated that way. But I could at least change the color.
Then I used word to add the seahorse and saved it as a pdf that I imported into inkscape. But I can’t seem to do anything with that. Tried converting object to path, and tried Trace Bitmap. No good so far. More hints?
Nice work! I am the same way and like tinkering and thinking outside the box.
I’m the same way, Joe. Tinkering and experimenting is more fun for me than just regular crafting. I especially love figuring out something that no one else thinks can be done.. I guess it’s the challenge. 🙂
If you follow this blog then you know this is absolutely what drives me. I am all about pushing the envelope and getting these machines to do what hasn’t been done before.
Thanks for the info! I sent you an email on a font license too! LOVE your stuff! <3
Thanks so much! I’ve just managed to emboss my first Fish!
I did have a couple hiccups, but I think I have it sorted now. I’m in Scotland, so the standard paper size is A4, which is slightly different than the US Letter your template is designed to use. I’m using an Epson 3880 to print and for some reason when I print from Design Space, it changes my ink setup from Matte Black to Photo Black, which is not ideal. I tried using the advanced settings, but even they don’t give me access to all the printer’s settings in order to set it to the correct paper/ink setup. In any case, I managed to print to a PDF file and then print the PDF via Apple Preview with the correct settings. I printed onto A4, but set it to print Borderless (Retain Size), so that it didn’t reduce the image size. Luckily the dimensions of the Cricut Print and Cut border still fit within the A4 size. I suppose if I want to print and cut larger than A4 I’ll have to sort out a different method, but for now this works!
One more hiccup I had was with the advice you give to only tape three sides of the paper to be embossed. The first couple times I tried this, the Cricut caught the bottom edge of the paper and tore it to shreds. (is there a panic button on the Cricut Maker? … I resorted to unplugging the Cricut to get it to abort the project.) So after a couple unsuccessful trials I tried taping all four edges and it worked a charm.
BTW, since the printer is now setup to use glossy paper, I thought I’d go ahead and use the Premium Glossy paper I have on hand for the stencil. It works great for the stencil, clean cut and seems to be durable as well. I used 90 lb watercolour for the embossed card and it looks wonderful!
Now I just have to get on with designing my own stencil and emboss file.
Thanks again for all of your great work in getting this to work on the Cricut.
Thanks so much for your detailed report, Lee. There is nothing in the file that dictates paper size. You would treat it like any other print then cut so A4 should not matter in that regard. I have had a couple of reports of the paper flapping up. I did not get good results with all 4 sides taped so I’m looking at some other options for this. It may be as simple as slightly curving the paper in the down direction. You should be able to press the pause button if there is a problem.
Not sure what all you tried with the printer, but if you have glossy chosen as the paper type it will want to use photo black.
Thanks! This is all new to me, but great fun learning what I can do with this machine.
this looks complicated for me. but i was hoping that there was a way to emboss with the cricut explore. could you make me a embossed snowflake file for design space. thanks
Thank you. You make everything look so easy. I love embossing. Do you ever work with the Black Cat Lynx?
Wow, this is fabulous stuff, I really am impressed with how cleverly you overcome limitations of Cricut by using third party software. Thank you so much.
Thank you so much! Your video instructions were detailed and easy to follow. Even I didn’t have the paper weights you recommend on hand, I was able to easily create the flat embossed fish with what I had. Can’t wait to start designing my own projects 🙂
So happy to hear this, Maryka! Keep me posted on how your own embossing projects go.
You mentioned that using the default offset in Inkscape might work. It did, and I’m glad that it worked because I couldn’t figure out how to change it.
Why can’t the image have trapped white space? Will it tear while embossing? Some other reason?
Thanks again,
M
The trapped white space rule is because we are making a one piece stencil. Trapped white space would fall out when you take it off the mat. I have been able to work around this limitation on the Curio, but haven’t experimented on how to solve this for the Cricut yet.
Gotcha. Thanks.
M
Wow! I was blown away! Thank you for posting! You give a very detailed yet to the point presentation which had to have taken a lot of prep! Nice job! Can’t wait to try!
Just found this post on Pinterest. LOVE IT! I love doing out of the box things with the Cricut. Unfortunately, I have only learned how to work with Design Space. Is it worth learning SCAL4? (Tried Inkscape and just couldn’t get it.) Can you import SCAL4 file directly to Cricut? Will be following your blog from now on.
SCAL4 is perfect for people who “just can’t get” Inkscape. SCAL4 exports DS friendly SVGs so it is a perfect companion.
Have you done the tutorial on how to create your own embossing files? I’m very interested in learning….I’ve looked at the infographic you made available but I need more help!,
Yes, the video has been added to the bottom of the post.
Thank You! I didn’t see it earlier…
Thank you for doing these tutorials…. I’m rather new to cricut and i appreciate those of you who have gone before us, worked out the kinks, and so generously share your knowledge and expertise with us. I’m wanting to emboss my monogram on notecards! Excited to try this!——Jill
Good info. Lucky me I came across your site by accident (stumbleupon).
I’ve saved it for later!
This is awesome Kay! Clever indeed, but also thorough which a lot of tutorials lack unfortunately.. Are you a Cricut affiliate? I honestly don’t even know if they do something like that but you should contact them about it or being featured or making a cut file for use with their machines… Something!! Lol.. Anyway, thank you so much for this. Saving for that embossing stylus I knew I needed! He he!