
Ever since I figured out how to get a really nice emboss with my Silhouette Curio, I’ve been wanting to translate that process over to the Cricut. Let me just tell you it wasn’t easy. As soon as I got it working, DS3 changed everything and I had to start over. Ugg.
I finally got it, though and you aren’t going to believe how well it works and how great your projects will look. If you ever “dry embossed” with a brass stencil, a stylus and a light table, then you’ll understand what is involved here. We’re going to put a stencil under our paper and let the Explore do the embossing for us.
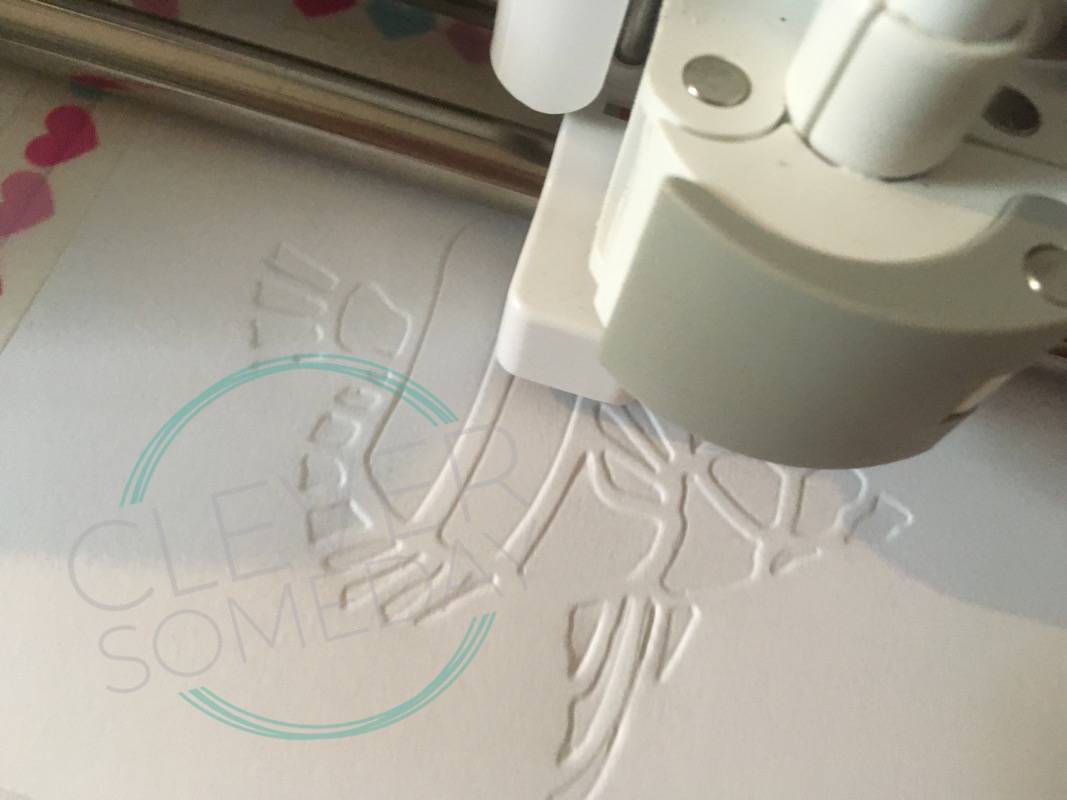
Since its kinda complicated, we’re going to have to do this in stages (I start getting anxious if my videos go over 10 minutes). So in this first installment, I’m going to show you the whole process on video and provide a file, as well as written instructions, if you want to walk through it yourself.
What you need:
– A Cricut Explore or Maker (some Cricut Explore Air 2’s have a scoring bug and won’t work. If you are an E2 owner with weak scoring pressure, please call support)
– Cricut Scoring Stylus
– A Cricut pen (optional, but simplifies things)
– heavy white matte cardstock that is both printable and cuttable (for the stencil). I am using Recollections 110lb/300 gsm card stock from Michaels, but this is too heavy for some printers, so use the heaviest card stock you can print on.
– media to emboss … I recommend Neenah 67 lb Exact Vellum Bristol, but any light to medium weight card stock will work. Cut it into 4 x 5-1/4″ rectangles for this demo (to fit an A2 card front)
(plain old 110 lb /200 gsm card stock from Walmart will work for both parts of this demo, but you might not get the crispest results possible)
My Design Space file– This link will open in Cricut Design Space on your computer (will not work from mobile devices). Click customize and save the file to your account.
I’m working on a tutorial for how to create your own embossing files. In the meantime I have prepared an infographic with the pertinent details for advanced users who don’t want to wait. This is going to require 3rd party software, unfortunately. Also hope to have some more files to share. Stay tuned.
Update: the video on preparing embossing files in SureCutsALot 4 is here!
In case you missed the link above, a printable PDF of the instructions is here.

Hi,
I’ve just watched your “debossing” of the fish. I have a question please. How did you get your sensor marks for your print and cut to be greater than the 6.75×9.25in. I have been wanting to mark larger print/cut projects but have been limited by this restriction. Thank you so much for your tutorial, it was exactly what I was searching for.
The print then cut is exactly 6.75 x 9.25. There’s no way around that for using the marks, but there are some other techniques you might try cleversomeday.com/printthencut
Thank you so much!!
Instead of having a print file To cut, why can’t you make the lines you need to cut, actual cut lines so it will cut up to 12”?
The print then cut sensor mark is needed to align the embossing with the underlying stencil. That, unfortunately, limits the size.
any idea if you could do this in another program besides SCAL? I have Photoshop Elements, Ink Scape (makes SVG files) etc… Im totally new at this but would love to make some art for a baby nursery using my new Cricut Explore Air :/
Yes, you can do this in Inkscape, its just not as straightforward.
I tried 3 times with different thickness of cards stock the lightest was 65lb and the scoring stylest tore my paper each time. Ideas on how to fix this? Thank you.
Cricut expression 2. Scoring stylist in the “pen” holder, removed blade.
Thank you again!!
When I had issues with paper tearing it was because the stencil was too thick or the design was too narrow in spots. Check that the tip of your scoring stylus is smooth with no rough edges. Also try decreasing the scoring pressure. Another trick is to rub was paper over the surface to be embossed to reduce the friction.
Hi Kay,
I watched your video on Embossing with the Cricut Explore and was wondering, do you have written instruction that show you how to get a picture or words to emboss? I was very happy that you posted Cricut Flat Embossing. I printed it and saw that it doesn’t show you how to begin with getting the picture of the fish.
Thanks
The video for preparing the image to emboss is posted above. The infographic also linked above provides all the necessary details in printable form.
Can you show how to start at the very beginning of how to Emboss? I need to know what I need to do before I get to where you show the embossing. Like how to make the template or pick a picture to start doing the embossing.
It doesn’t sound like you watched the SCAL video above. That is where I cover the file prep from the start.
Thank you for this. I haven’t watched the video yet but I was actually beginning to regret buying a Cricut! I bought it on a bit of a whim to start papercrafting and card-making but so few of the tips and hints seem to cover this (first trawls of Internet brought up vinyl and fabric projects).
So thanks for showing that Cricut really can be used for paper projects.
I just followed your directions. They were great! My embossed fish came out and looks wonderful. No problems. I have the Cricut Maker. Thank you for the file and your great instructions.
Thank you so much for sharing this! I just tried the fish – from creating the image in SCAL 5 to cutting and scoring it on my Cricut Maker. It came out perfect! Thank you for the very clear instructions and video.
Will this work with the Cricut Explorer Air?
Yes!
You are very, very clever. I had been scouring the internet for a tutorial on embossing. Thank you. I am new to Cricut, but am finding out that Corel Draw and Cricut were made for each other.
I appreciate your fantastic how-to’s! I’m just starting to explore Cricut & Silhouette machines, and I’m trying to work out what would be better for me (I create my own artwork in Illustrator or Procreate and want to be able to import my own images for a machine to slice around so that I can create sticker sheets, but I also make my own envelopes and so I need a machine that will both cut out the envelope and score the fold lines). I’ve been leaning towards the Silhouette Curio for it’s embossing functions, but this tutorial is now opening up other possibilities.
But here’s the point of my commenting – can you explain why the score design of your fish is a dashed/incomplete line? I would have just assumed that you could use the full outline of the fish, just inset the line a little from the stencil.
Hi Melissa and thanks for your kind comments. The dashed look on the fish is simply how Cricut Design Space displays items that are set to score. The scoring will actually be a solid, inset line.
Oh interesting! So it’s showing it like it would as an indication of fold line. Thank you!
Obviously you can’t advise me personally, but in your opinion and experience, do you think the Curio or a Cricut is easier to work with for cutting and embossing? (For someone with no experience of either, but who does have experience with Illustrator and other complex design programs.) I’d really value your opinion if you’re prepared to offer one.
In my opinion, the Curio is a better choice for artists/experimenters, because the Silhouette environment is much more flexible and conducive to unorthodox usage. Porting the techniques to Cricut for the larger audience is an interesting logic puzzle for me, because it always involves a complicated set of workarounds. The Curio is very limited, though, when it comes to size of cuts and materials that can be cut, so you have to weigh that as well. Using Illustrator will mitigate many, but not all of the limitations of the Cricut ecosystem.
Many thanks for your response! I truly value your opinion and am grateful you took the time to explain these things so well. I’m thinking the Curio will be the better option for me. I need flexibility in how I make use of it, but I don’t need to cut unusual things – just paper and stickers. So the Curio’s limitations hopefully won’t be a problem.
I’ll probably get one and then they’ll release a new and improved model on me. LOL!
Is it possible to emboss with the cricut maker and fabric? Any recommendations on fabrics and other materials needed? Thanks!
I haven’t tried it, but I would think you would need to stiffen the fabric to a paper-like consistency in order for it to hold the embossing.
Just tried this while following your video. Worked perfectly. Thank you
I have watched both videos and first when doing my image in Sure cut a lot (using version 5) when i changed my colors i don’t see my image just red and blue boxes unless i put curser on the box then i can see the image second when go into design space and create the box i can’t get a write symbol just cut.
Not sure what is going on with the boxes as I’ve not experienced that. I would go by how it looks once in DS and if that’s OK then I wouldn’t worry about it. As far as the write symbol, DS has changed and that is now selected with the Line Style pulldown above the canvas.
Thank you! I knew there had to be a way to deboss without a Maker! My goal is to not have to buy any other tools! No punches, no embossing, no more tools!
Thanks! This kind of embossing can’t be done even with the Maker embossing tool.
how can i just emboss the outline of a simple rectangle whereby i can make the thickness of the lines as thick or thin as i choose, also without scal?
Normally for line embossing you are limited to the width of your debossing tip. But you make lines appear thicker in DS by attaching multiple closely concentric rectangles such that you get tightly spaced parallel outlines.
Brilliant! Thank you, Kay!
PS Are you an engineer?
Thanks, and yes.
Thanks, and ha ha yes, I am an engineer.
I just purchased a Cricut maker and after reading this post I’m winering if I made a mistake. I have a life and it doesn’t leave enough time to invest I this level of work do do f’ing crafts. Does anyone else feel the same?
This is not a standard Cricut operation, but a explore-the-boundaries kind of experiment, which is what I tend to specialize in. If you stick to the things the Maker is advertised to do, especially at first, hopefully it won’t be frustrating for you.
Kay,
I recently watched your flat embossing with Cricut videos. I knew there had to be a way to do that with the Cricut. I’m wondering if it is possible using an existing SVG. For example I have a balloon that I would like to flat emboss. Looking forward to your answer. Thanks in advance
Yes. The bottom video in this post details the steps for preparing your own images.
This is so cool! There’s a project I want to make using aluminum and would love to emboss it. Looks better but I didn’t want to buy an additional tool I wouldn’t use much afterwards I was going to just settle for debossing instead. I wonder if this would work for aluminum as well. I may try although my only print and cut experience wasn’t that great. It worked but the cut was a little off from the design.
I believe this technique will work on thin aluminum but its not needed as thin aluminum (unlike cardstock) will emboss/deboss with the scoring stylus or debossing tool without need of a stencil. The advantage to the stencil with aluminum would be to get a flat emboss vs a line emboss.
Yes, thin aluminum cans. So meaning the opposite side of the aluminum you deboss should be embossed? That’s what I thought but since no one mentioned this in any videos I found I thought maybe it didn’t apply enough pressure to work that way.
It actually takes less pressure to emboss thin metal than it does cardstock. There are several good videos I know of on this. Here’s on https://www.youtube.com/watch?v=Cc30T_z-shs