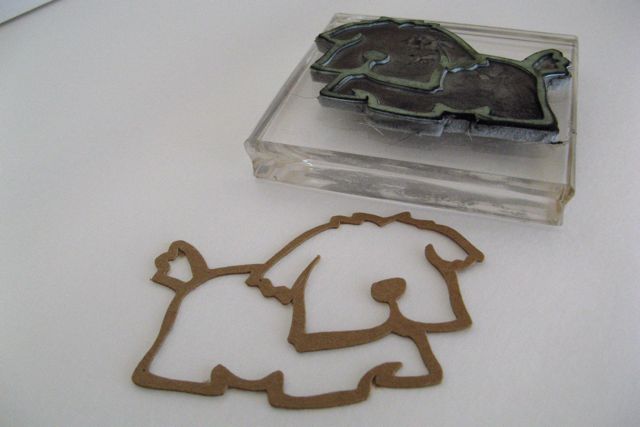
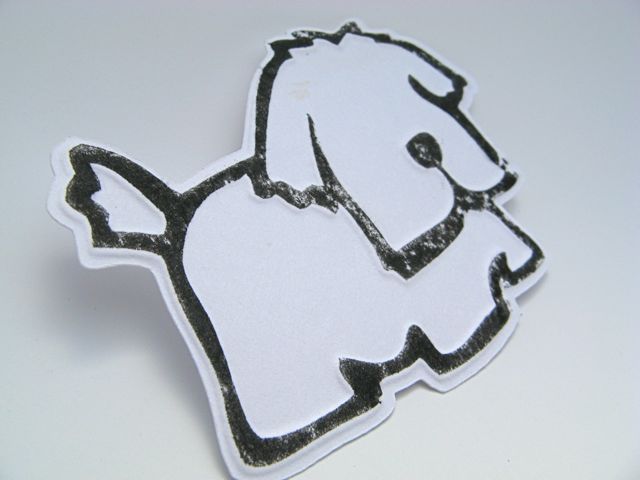
I have had an idea rattling around in my head for a while and when I finally took time to try it out today I was amazed at how easy it was.
To cut, you will need a Cricut and a cartridge with a shadow feature.
To emboss you will need a Cuttlebug, Big Shot, Sizzix or similar machine, a piece of chipboard (cereal boxes are fine) and an embossing mat such as the tan Spellbinders or red plumbers rubber.
To stamp you will need some sort of cuttable stamp material. I could not get this image to cut with the clear silicone sheets like in the Cricut kit so I used the green rhinestone rubber material instead. You could also try 1/32 inch red rubber sheets or even fun foam.
Choose a simple image with stamping and embossing in mind. I chose a one piece image for the sake of simplification and I suggest you start with that. Cut as many blank shapes as you want from plain or (for embossing only) white core card stock using the shadow feature. Use the same dial size to cut the image itself once from chipboard and once from the stamp material. Make the stamp according to the instructions for the stamp material you are using.
Stamp the cutout with your custom made matching stamp, centering the image as much as possible and allow to dry.
Layer your cutout with the piece of chipboard, line up so that the chipboard is centered on the cutout and place them chipboard down on the B plate. Cover with embossing mat and shim as needed to get a nice emboss with your Cuttlebug.
That’s it, you now have a stamped, embossed cutout to apply to your layouts or cards!
Or if you skip the stamping you can just emboss. This one uses white core card stock and sanding so it shows up better for the photo.


What an awesome idea!!! I love this! (and I love the image- from Paper Pups, I think- yes?) I’ve been wanting to make some stamps with fun foam and the Cricut anyway- this will be so much more fun! Thanks for sharing!!!
Just saw your tweet and had to come check it out. This is really neat. I’m anxious to try it. Thanks for sharing. (BTW, I’m javajunkie1225)
Oh ma gosh! This is the cutest thing ever!!! I loooove this dog! What a great tutorial, ty so much for this! Bigg Huggs, Jessie
I’ve been pondering this all week, now I don’t have to figure it out because you’ve done it! TFS : )
Foam fun for me gets a little jagged when I cut it, so I was thinking of putting contact paper over the top to see if that helps. Of course, sometimes the jagged works better. Good to know that Pazzles stamping is different, I definitely have to check this out!
Oh I LOVE this….VERYVERY clever!!!
I have done the embossing somewhat like this, but have NEVER given any thought to stamping too. oh the possibilites, Clever!!
Kay,You never sese to amaze me!!! Thanks for the great info!
Thanks ! what a great idea
Wonderful idea. Can’t wait to try it!
OMG! This is soooo cool! That little dog is so cute and so unique!
Great idea and tutorial! Thank you for sharing.
endless opportunities !!
I’m thinking that sanded example would look great framed !
Completely brilliant! Love that cute doggy!
That is very cool