
I’ve been experimenting with a new technique for getting a distressed look with heat transfer vinyl and while it may not be ready for widespread adoption, I wanted to go ahead and share it with you.
What you need:
heat transfer vinyl with mylar backing (I’m using Siser Easy Weed)
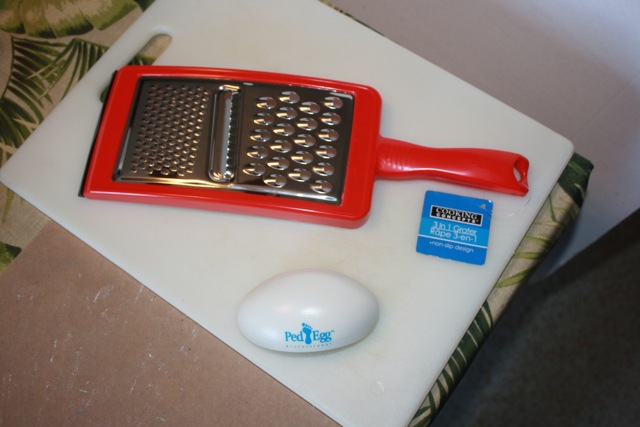
a cutting board or other hard surface you don’t mind damaging
a new or clean Ped-Egg
optionally, a new cheese grater like the one pictured from Dollar Tree
Cut and weed your HTV as usual. It’s a good idea to practice with scraps so grab some of that HTV you forgot to mirror!

Place it on your surface sticky side up and begin to scrape across it with the Ped-Egg. The goal is to cut through the vinyl layer without lifting it, and to do minimum damage to the mylar. Start slowly and lightly and increase your pressure until you get it right.

It helps to extend it over the edge of your cutting surface for better contact with the cutting teeth.

After a bit, brush the excess away from your design onto the surrounding sticky area and see what your design looks like from the mylar side. Continue with several more cycles until you reach the desired level of distress.

Inspect the vinyl surface and remove or tamp down any larger flaps or tears that would hinder the vinyl from laying flat.
Press as usual or a little shorter on time, then remove the backing and repress with just the teflon sheet for a few seconds to be sure all the vinyl is secure.
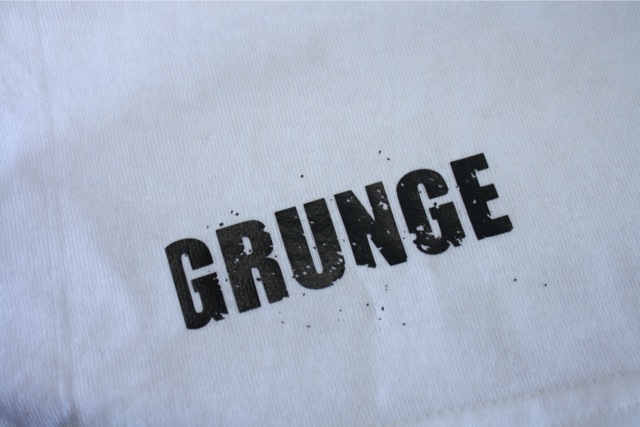
Because the teeth on the Ped-Egg are small, it produces small scale distress (the letters above are 1 inch tall). For larger scale images, try the large round holes on the Dollar Tree cheese grater. This will result in more flaps and damage to the vinyl and backing, but you can use the Ped-Egg in a subsequent pass to help clean it up.
IMPORTANT: Let me emphasize that this is experimental. This technique obviously does not allow for optimal adhesion of the vinyl across 100% of its surface and especially along the distressed edges. Some of the tiny pieces will not adhere at all because they will be upside down. I do not have long term wear or laundering experience with this. Use this technique at your own risk. And of course, use appropriate caution when handling sharp objects.

Did I miss the post for the files you created using embossing files?
Warmly, Beth Newl
No, am still getting them ready to publish. Shouldn’t be too much longer.
I am so excited that you posted this! I have been wondering how to get this look which is very popular right now!!!!
Very nice!!! I just love your ideas and share your youtube with people all the time. Thanks so much!
Oh this gives me some options! I have been wanting this exact look with my heat transfer vinyl…now I have somewhere to start. Thank you!
Wow fantastic grunge! I can’t wait to try it. Thank you for sharing
Awesome! I can’t wait to give this a try!!
This is cool! Thanks!
I just found this post today. Glad I did. If your still getting these messages, how has this held out over the year. How’s the washable. Does it last? Have you found anything else? I’m new. Just bought cutter and heat press two months ago. I am loving it!
Have not had any problems myself or gotten any reports of issues with this coming loose. It really should be no different than cutting a distressed design. If I find anything else, you can count on me posting it here!
If I have already applied the vinyl lettering to the windows of my car from the outside, can I execute this process to get that effect?
I would not recommend that. Don’t think it would scratch glass, but not would probably smear adhesive residue that may be difficult to remove without affecting the rest of the vinyl.