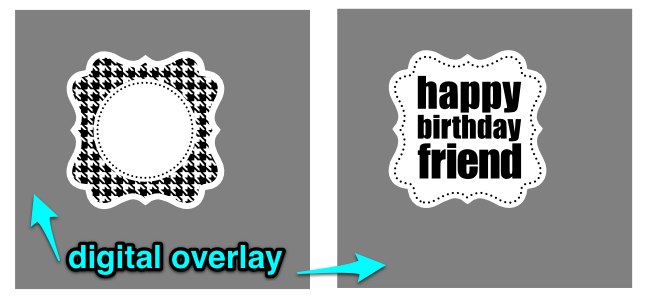
I have gotten several requests for a tutorial on making the digital stamps/printables that match the punches. The problem is I use a mix of oddball software for these and it isn’t a very straightforward process the way I’ve been doing it.
Nevertheless I’ve been able to distill it down to a set of general steps that you can use with whatever design software you are familiar with. If you don’t know how to complete a particular step you may need to check Google or Youtube for a tutorial on how to do specific things with your specific software (for example “how to fill a shape with a pattern in PSP”). So here we go:
-Punch a piece of black paper with the punch you want to design for.
-Scan the punched out shape with some sort of dimensional reference such as a 1 inch square cutout, a ruler, etc.
-Bring the scanned image into your design software and autotrace or make a path/shape of the punch’s outline.
-With the aid of your reference item, resize the traced punch shape to its exact real-life size. In other words, the one inch square should read 1.0 inches when measured within the software. Once you’ve done this, the reference item can be deleted. Save a copy of the punch shape somewhere safe so that you only need to do these first steps once.
-Working from a copy of the punch shape you saved, use inset, internal offset, contract or other similar command to create a new shape for your design with the desired margin to the edge of the punchout. Also save this inset shape somewhere safe as this only needs to be created once as well.
-Fill the inset shape with the color or pattern of your choice.
-And/or set the stroke (outline) of the inset to the line style of your choice, or use pattern along path, text along path with symbols, etc. to create the border of your design.
-Add shapes, text and other elements as desired to your design.
Tip: I find it helpful to use a digital overlay of the punch’s negative (the hole it leaves behind) to better visualize how the design will appear after punching. It’s even better if this is on its own layer that you can toggle on and off as you work.
-Once you have a design you like, duplicate it and use it as a base for additional designs with different colors, sentiments, etc.
Tip: Remember that because these files are made for specific punches, they must print at the exact design size to work correctly. Saving the print-ready versions as PDFs is a good idea for this reason, especially if you are sharing the files.
When distributing files, convert text to paths or rasterize text (so that the files work for those who don’t have the same fonts installed as you). But remember to always keep a fully editable version for yourself.


LOVE this idea! Make your punches do more than just used once or twice for a punch! Brilliant!!
Thanks
Thank you for this great tute and all the digistamp downloads. You’ve been so generous with your talent! I really appreciate it. It inspired me to make a video and digistamp download of my own, based on yours. You can view the video and freebie on my blog http://www.stonysilence.com/blog/ It’s the first time I’ve ever made a freebie, so I hope it works! Thanks Kay!
Thank you so much for posting the two sets of designs for the Real Estate Punch. I enjoy using them for card-making!
I appreciate the DIY instructions and cannot wait for a chance to try them. I teach, and summer break is over. I will look forward to things slowing down and having a new tech project to try!
Hoping Gimp will be suitable.
Thanks for the originals and for the opportunity to try on my own.
I really think this is cool. I am afraid I am not computer savvy enough to do this but would like to try. My biggest question right now is where do you get your pattern fill designs?
Mary, the design programs you would use for this typically have a library of patterns built in and/or a way to download and add patterns from the internet or that you create yourself. You would need to google instructions for your particular program (i.e. how to add a pattern fill in PSE or how to add more patterns for Silhouette Studio)
Kay, thanks so much for this tutorial. I love the real estate punch files that you shared and use them often. I am not sure if I can follow this but I am going to give it a try. If you find yourself so inclined sometime with extra time, a step by step video would be so nice. I know that is a lot to ask so I will say thanks again for all the time you have already spent on this. Melissa
TY TY TY TY. I have been searching for days trying to find this exact tut!