
Print and cut on the Silhouette is one of the great joys of life, and if you have a Silhouette and are not enjoying this you are missing out! The idea is remarkably simple: the 3 marks and your images inside them have to be printed at exactly the same size and position as the Silhouette’s eye expects, or your cuts will not match the prints.
In practice, though, there are a whole lot of things we can do to unintentionally foul this up (mostly things that the software should catch but don”t get me started on that), so I’ve attempted to put together a fool proof sequence. Once you learn the basic principle (that the paper has to match the screen exactly) then you will be able to loosen up, but I want you to experience success, so I have included everything I can possibly think of that could trip us up.
I highly recommend that you use plain white card stock while you are learning (or if you are having problems) to rule out paper color/surface finish as the issue (makes it hard for the optical eye to find or read the marks accurately). Also, while 3rd party mats usually work fine, it is best to learn print and cut using a Silhouette brand mat, so as to not introduce another possible source of error. Once you’ve got the process down, there are workarounds for colored/specialty stock and you can feel free to use a different brand mat.
The order of these steps is very important, and what I think has been missing in the instructions coming out of Silhouette America, so step through them sequentially. V2 screen shots have a teal border, V3 screen shots (included only when different) have a white border.
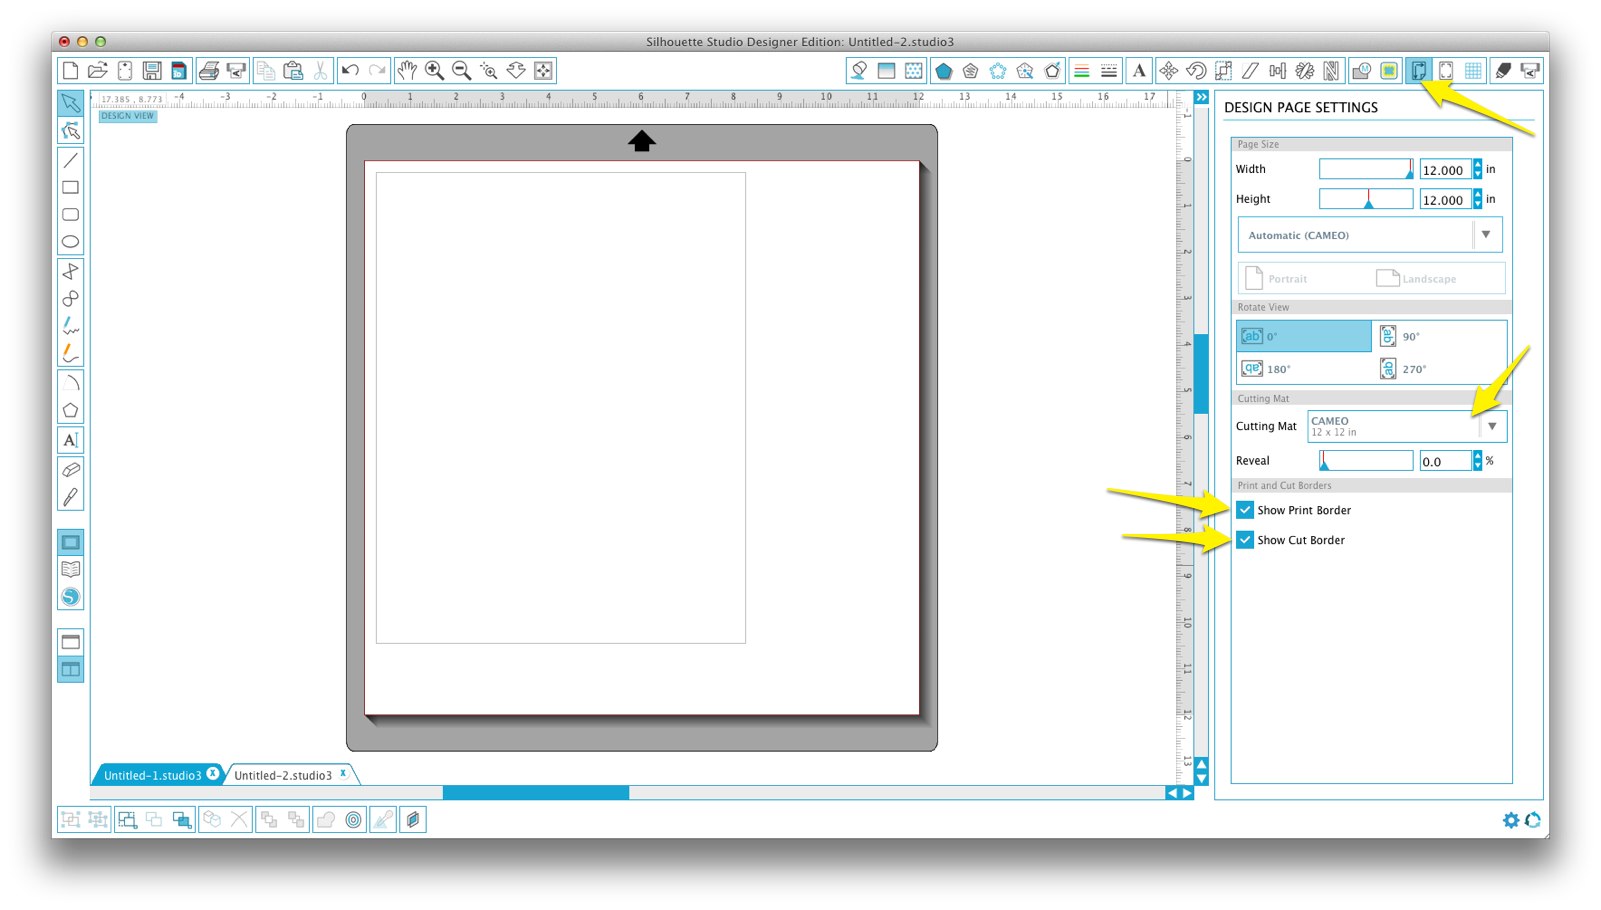
-From a new document in Silhouette Studio Open the Page panel and select your Cutting Mat. In V3 also check Show Print Border and Show Cut Border.

-Set your Page Size and Orientation in your Printer’s settings
on a Mac: File>Page Setup select your printer, paper size and orientation and verify it is set to 100%

on a PC: File>Print, select Printer, then Click Preferences, set Page Size and Orientation, then OK, then Apply, then x out. (may differ slightly depending on your printer)

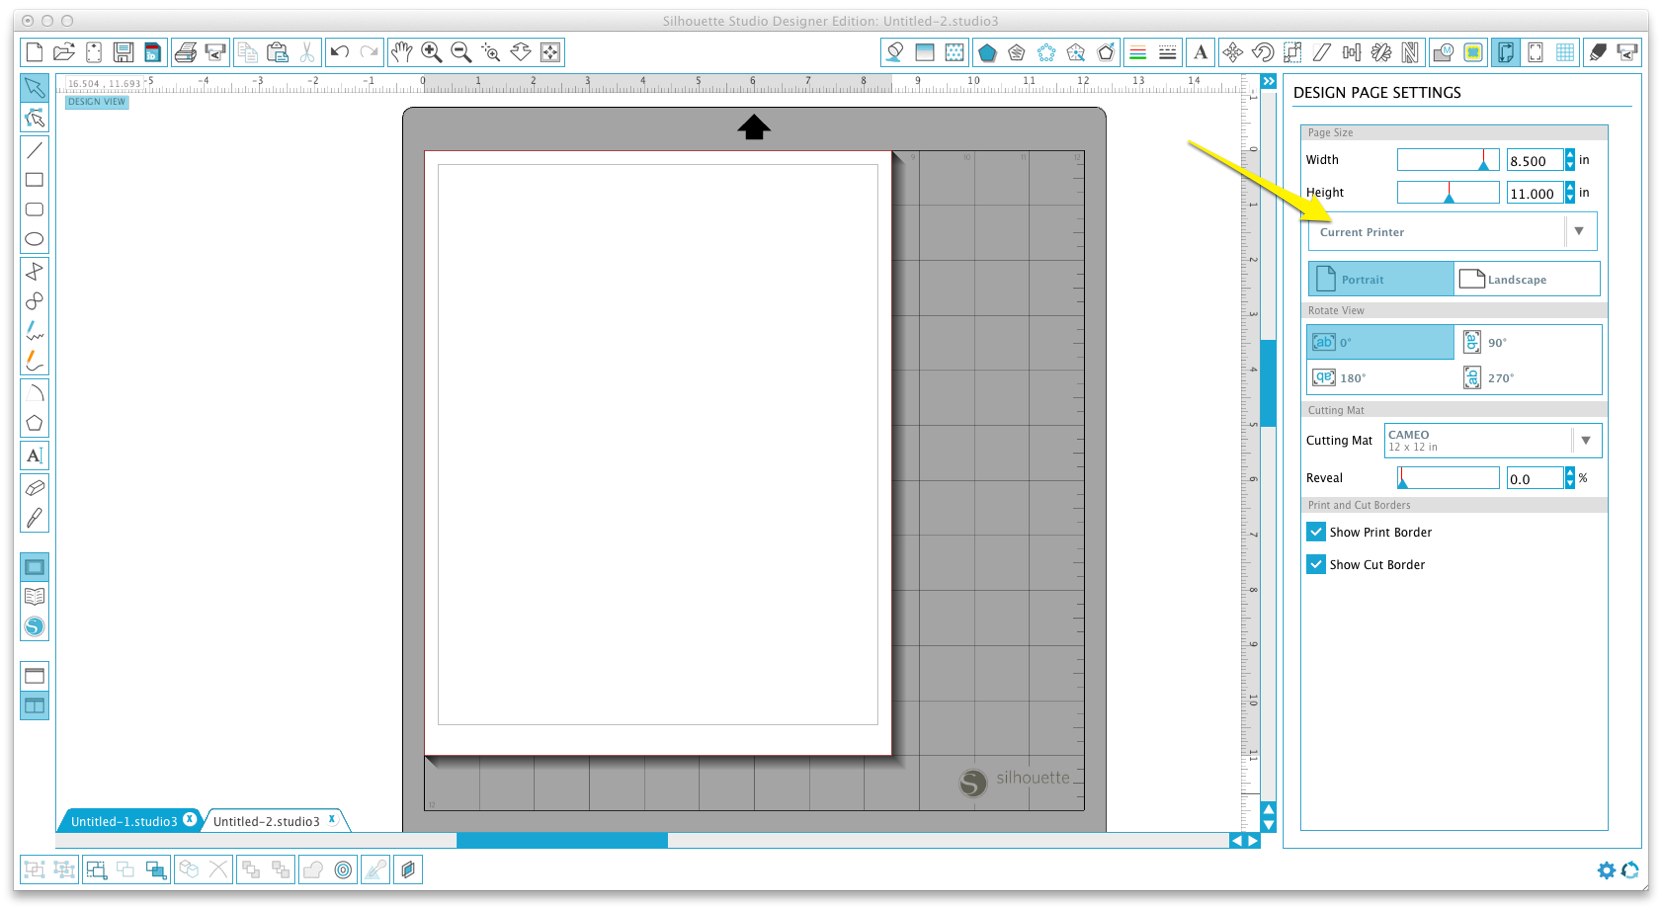
-On the Page panel in Silhouette Studio V2 click Use Printer Setting. In V3 select “Current Printer” from the pulldown menu. You should see the virtual paper on your screen change to match the settings you chose.

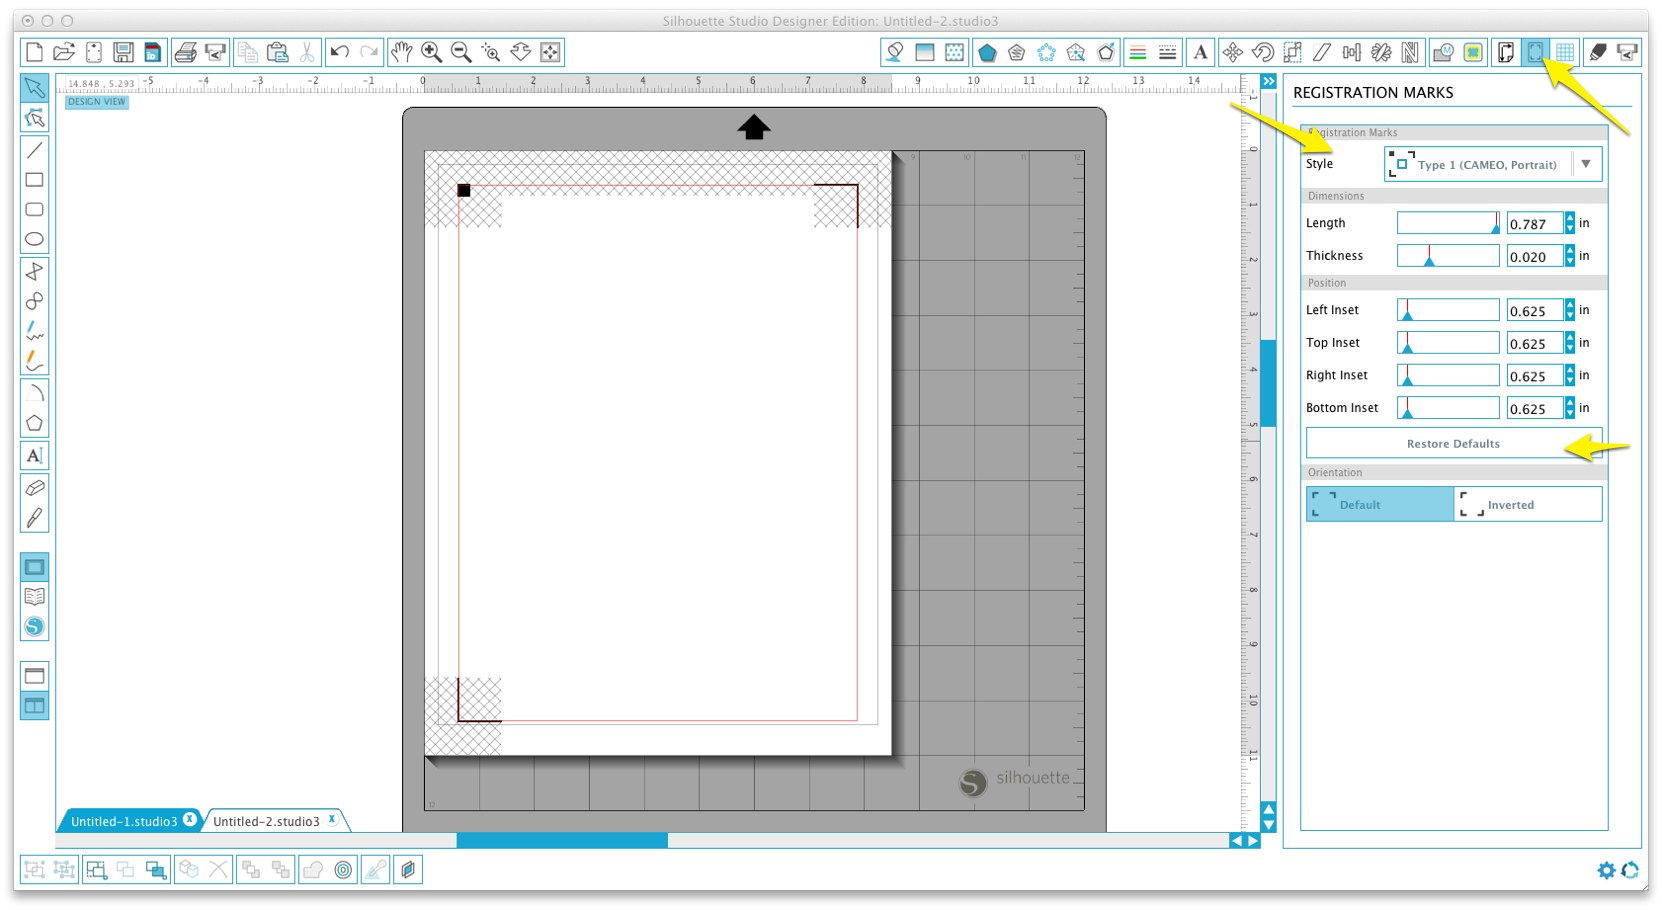
-On the Registration Marks panel for V2 click Show Registration Marks, and select Auto from the Reg Mark Format box. In V3, select the appropriate style of marks for your machine from the pulldown.
Make sure you have the correct marks for your machine (a square and 2 L shapes for Cameo or Portrait). Click Restore Defaults as it is best to use default positions while you are learning or return to them if you have problems (Especially important in V3).

-Prepare your design. I highly recommend you start with a print and cut file from the Silhouette store because all you have to do is place it on the mat. You should have some in your library already. Preparing other types of files is covered thoroughly in other tutorials but basically for a “tag” style (text inside shape), type your text and fill it with a color using the Paint Bucket button (very important), draw tag shape and position, set the tag shape to Cut Edge. Or for a “fussy cut,” Trace Outer Edge to create the cut line. See this video for a detailed tutorial on tracing for print and cut.

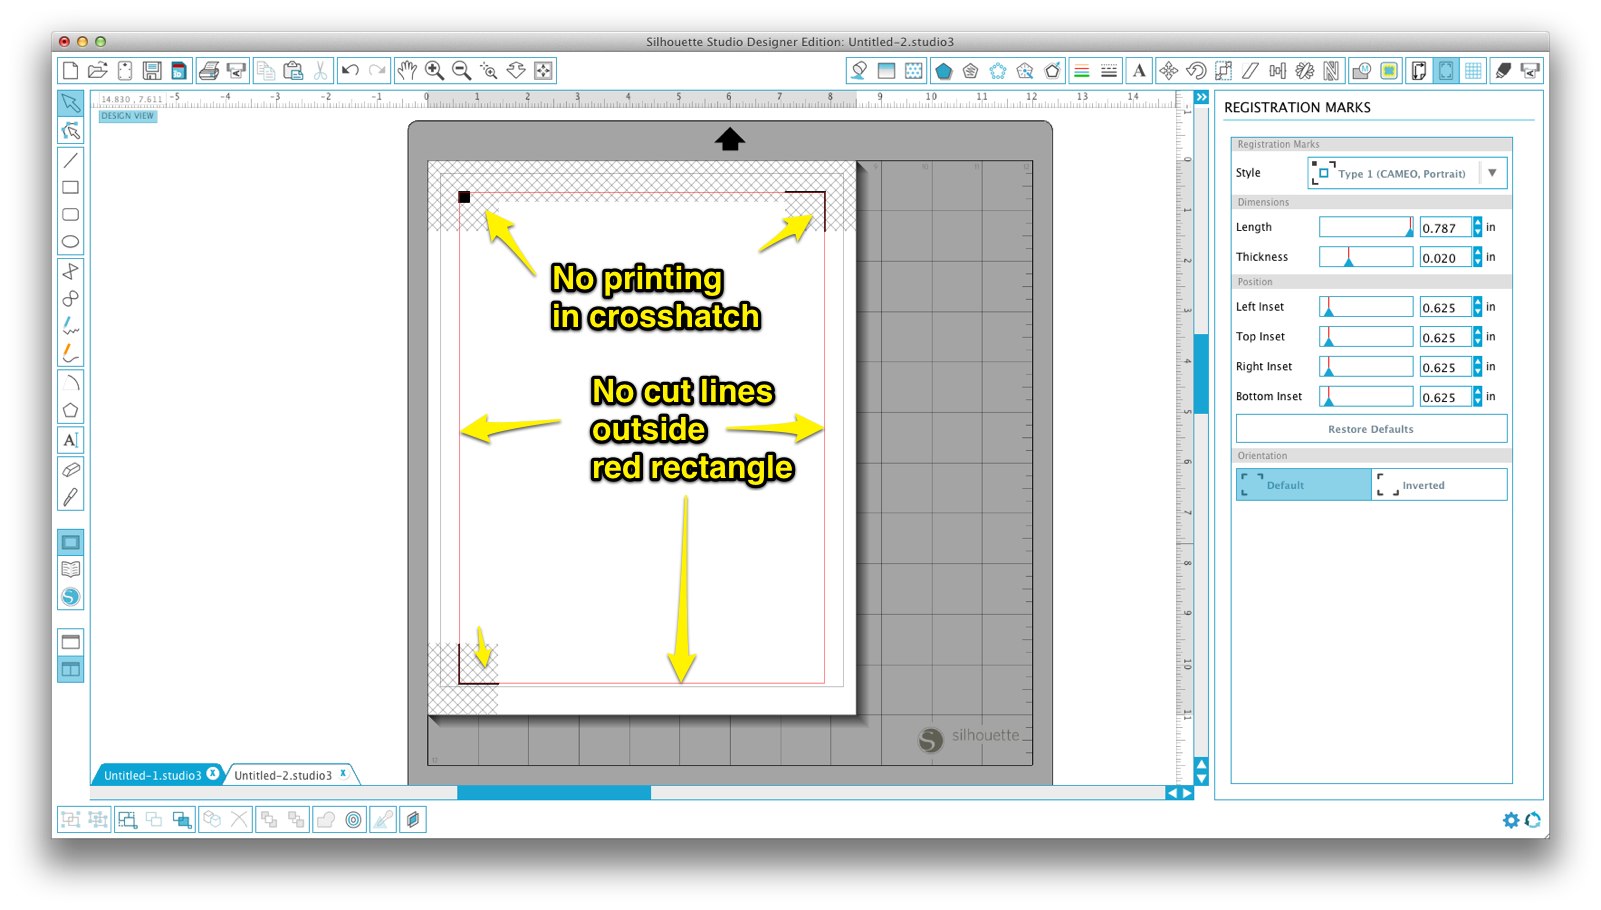
-Duplicate and/or position your design(s) on the page verifying that printing does not encroach on the crosshatched area and that the cuts do not extend past red cut margins.


-Do a print preview to verify that the planned print looks correct.
On a Mac, File>Print>PDF>Open PDF in Preview
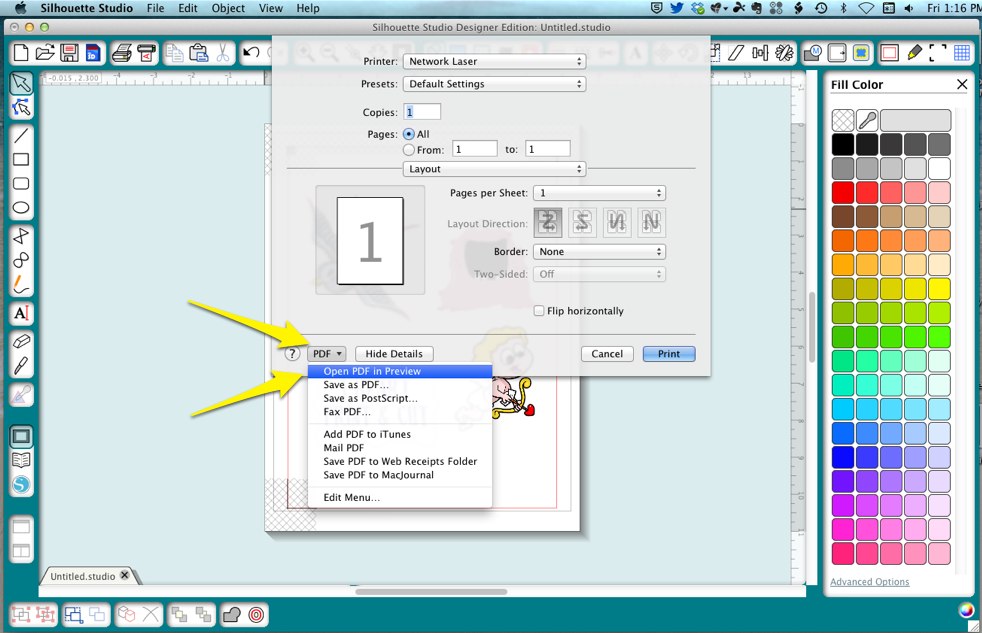
Windows users: install a PDF print driver such as Bullzip or PDF Creator if you do not already have a print preview option available.

-Carefully inspect the preview image to check that all 3 registration marks are displaying fully and that all lines and objects you want are visible and complete. Verify that cut lines are not printing.

To correct shapes that are missing either fill them with color (Paint Bucket Button) or check “Print Lines of Selected Shapes” on the Line Styles (button with Black Horizontal lines) panel.

-Do a “cut preview” by opening the Cut Styes panel. Shapes set to be cut will be highlighted by thick red outlines. (If using Advanced settings in V3, thick outlines may be other colors besides red)
Activate/inactivate cut lines as necessary by selecting shapes and clicking the buttons on the right.


-Select File>Print and choose print settings to ensure 100% size (not fit to page, etc) and those appropriate for your paper type. Details will vary depending on your printer, driver and operating system. Representative Mac and Windows 7 screens shots follow respectively.


-Load paper into your printer and print.
Important: This is the point of no return. After printing you can not move any objects or change any settings that effect the margins or the mat without jeopardizing your print and cut accuracy. Consider your design frozen and change only settings in the Silhouette Cut Settings panel from here on out. If you need to make other changes you should plan to reprint your file.
-Open the Cut Settings window and set/verify settings appropriate for your media.


-Place the print on your mat according to the image on your screen and be sure it is attached firmly.
-Compare the mat/printout in your hands to the image on your screen Did the registration marks print completely? Are the page, design and objects in the proper orientation and relative positions? (Crosshatches and margin lines will not print.)


-Set the physical blade depth according to your material and verify that the rollers on your machine are in the proper position as shown on the screen.
-Verify that Load Cutting Mat(Cameo) or Load w/Carrier(SD) is selected on the machine’s LCD

-Align the mat with the shorter leftmost line on the base of the machine and load the mat (on Portrait use Load Mat button).

-Leave the lid of your machine open and ensure adequate ambient lighting.
-Press the Cut button on the Silhouette Cut Settings panel or click the Send to Silhouette Button.


if prompted, click to Skip Printing, Continue and Detect Automatically (V2 only).
-If automatic detection fails, try manual detection, following the instructions on your screen.
-Review your results. This should be when the rush of happiness occurs, but if not, don’t give up!

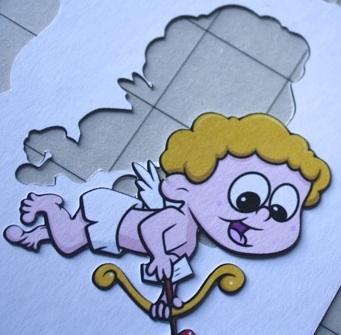
Slight misregistrations are normal and can be hidden with design tricks like printing a bleed area the same color as the outer edge of your design or cutting slightly inside the design. I used this technique on the angel below and cut just inside the black outline.

If your cuts are less than a few mm off, try calibrating your machine according to the instructions in the Users Manual under the Help menu.
If your cuts are 1/4 inch off or more, or get worse as you go down the page, go back though the steps above and/or through the SA Troubleshooting steps.
For really great print and cut tutorials and projects visit Under a Cherry Tree.

Thank you SO MUCH for this in-depth tutorial. Now I have to get the courage to try it!
Thank you so much for this. You always have such great tutorials to use with the Silouhette. I guess this means that I will bite the bullet and download the newest version. I have just been skiddish to try it.
Thanks again.
No need for the newest version, in fact version 2 works better for print and cut.
Great! I didn’t want to go to V3! You are awesome!!
Thanks you Kay for all your valuable tips. I’ve learned so much from you.
Thanks for another great tutorial, Kay!
Kay, this is the most thorough and clear tutorial for print and cut! Thank you for the time and thoughtfulness of posting this valuable information. i have done quite a few print and cuts but you have shown additional steps I can take to make them better. I always pin your tutorials and then look forward to the next one.
PS What do you think about the new machines coming out this fall?
Thanks for the information! Just the other day I was teaching a friend how to work with certain features & I mentioned the P&C. We tried it with specific Silhouette P&C files, and it worked perfectly. She was thrilled to learn about this feature!
Thank you for this excellent tutorial! This one will be printed and slipped into plastic sleeves to keep handy!
Fabulous tutorial! Came out perfect the first time! Found you through Cameo Beginners page on Facebook.
Reblogged this on fairyeyez04.
How can I print this information to have handy for reference? I just started following you via email. Am I missing a printer friendly button? I hope to learn a lot from here. Thank you!
Thank you so much. I had an issue with my print and cut projects, and after this tutorial I figured out the problem. Thanks agai.
Hi Kay. Been before asking about changing over to V3 and your tutorial worked a treat.
Can you tell me now how to save them to my library? I can save, but, when I go back to get them? the images are there, but, they have ended up on a plain sheet of paper, everything else as gone to lines are marks, please what am I doing wrong.
Chrissy
You are not doing anything wrong. This is how Silhouette Studio works. When you save to the Library it is saved as art, not as a project so you lose all the settings, registration marks, etc. This is why I always recommend that you keep my templates in .studio form instead of importing them to your library.
Lifesaver! Thank You so much!!
That is the way of teaching! Thank you Kay.