Using transfer tape makes aligning the cut pieces of a vinyl image simple. (If you have no idea what I am talking about you may want to watch the video on this page.) It would be wonderful to use the same technique for paper-based projects, but the trouble is that commercial transfer tape, Cont-Tact paper or painters tape tear up the surface of your cardstock cutouts when it is removed.
In my quest for a solution, I tried Press-n-Seal first. I love Press-n-Seal, it has literally saved my son’s skin during cancer treatments, but it was not the solution to this problem. Like tape, it didn’t want to let go of the cardstock without a (destructive) fight.
In poking around my boxes of never-used supplies looking for sticky things, I found some Magic Mesh, and it fit the bill perfectly. (Magic Mesh was a colored version of drywall tape popular for adding texture to scrapbook pages and cards in the early 2000s) You can also use the much cheaper and easier to find self-adhesive mesh drywall tape from a hardware store. Follow the steps below to use Magic Mesh/drywall tape to easily transfer your cutouts from mat to page:
1. Make your cuts, then remove the part of the cardstock you don’t want, while carefully keeping the parts you do want stuck down and in position on the mat (called weeding in the vinyl world). For cuts that are not clean, use an exacto knife to help you punch out the pieces and keep them in position.
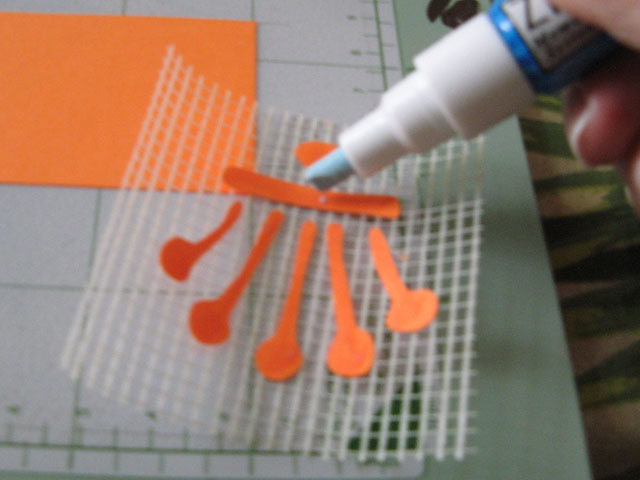
2. Loosen the pieces from the mat a little, while keeping them in position. I do this by holding down one end with my finger or a toothpick and lifting the other end with the spatula tool. You only need to loosen one end of each piece to “break the bond” with the mat. The results will look something like the photo below. Notice how on each individual piece, one end is stuck in position and the other end is “free.”
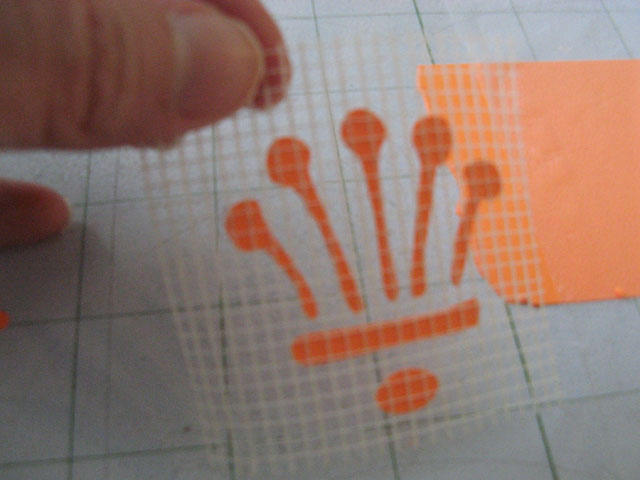
3. Put a piece of Magic Mesh/drywall tape over the image adhesive side down and press down firmly over each piece of your cutout.
4. Remove the mesh from the mat and your pieces will come with it! Now would be a good time to do a trial positioning on your page or card. If something is a little off, the Magic Mesh/drywall tape is repositionable so it’s easy to scoot things around if you need to.
5. Turn over the mesh and apply your adhesive to the pieces of cardstock. Try not to get adhesive on the mesh.
6. Position the mesh with your glue-loaded pieces over your page and press into place.
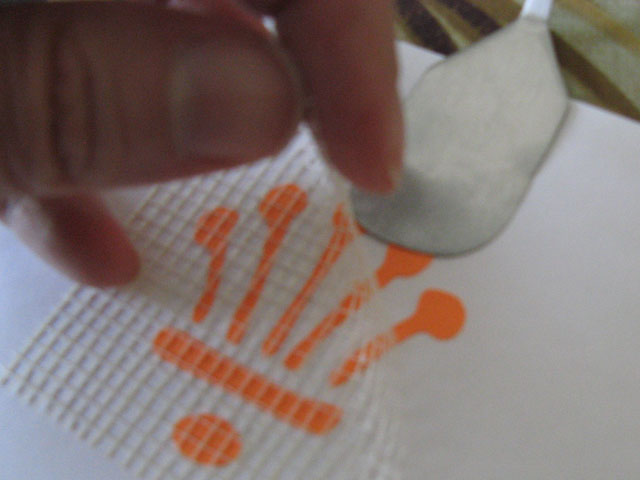
7. Wait for the glue to dry and then remove the mesh, which can be reused. Or, if you are impatient like me, go ahead and remove the mesh before the glue dries, using the spatula if necessary to assist in the process. You could also try holding the pieces down with a toothpick through the open area of the mesh.
This is really a lot easier to do than to explain. You will get a feel for it pretty quickly and be able to adjust according to the stickiness of your mat and mesh, and the surface characteristics of your cardstock. This technique should be very helpful for paper piecing (without a Cricut, line up your handcut pieces over a printed guide, then transfer with Magic Mesh), for placing lettering (with or without a Cricut, use the grid on the Magic Mesh/drywall tape to line up individual letters), and especially for text in a circle or other complicated images that need to be positioned precisely. I’d love to hear how it’s working for you.
For a video of this technique see this post.


WOW – what a great tip!!! Thanks for sharing with all of us.
This is a great idea! Thanks for sharing!
This is brilliant!! Thanks for sharing 🙂
That is a GENIUS idea!!!!!
Thank you so much, this is going to save me sooooo much time!
that is a great tip!!!!! I have a ton of this stuff!
Oh man, I think this is a fabulous idea. I didn’t know you could re-stick magic mesh. I’m going to try it. Love the message board and all the ultra creative ladies.
i’m SO going to get some magic mesh ASAP! GREAT IDEA!!! WOW!
What a fantastic idea… thanks SO much for sharing this!!
Can hardly wait to try this…what an easy solution to a ‘challenging’ problem!!! Thanks so much!!!
You have SO saved my life! Thank you for posting this.
now – don’t that beat all. good idea. i bought contact paper and it is too sticky. i had heard so many rave reviews for it. i am off to try your idea. Thanks.
Theresa,
Contact paper is highly recommended as a transfer film, but only when working with vinyl, not paper or card stock. That’s probably what they were talking about.
Hi, I try this with vinyl and it did not work good at all, maybe me
Will try on cardstoch for ny lineing up is off.
HAGD
No, this is not for vinyl. Vinyl already has many good solutions (I like to use clear contact paper with vinyl).
Oh my gosh, this is brilliant!! Thank you so much for the very clear directions!! ( And now, to use that gawdy red magic mesh that I will NEVER use for anything else…) 🙂
Great Idea! I guess you could also use that stuff for dry walling? Not sure what it’s called but probably cheaper!!
Yes, that is what I recommended in the post. It is called drywall mesh tape, drywall patch fabric, etc.
What a terrific idea! I really could have used this during Christmas with some of the intricate snowflakes I wanted to do!
sooo smart! I’m going to have to buy some of this!
Awesome! Thanks so much for this!!!!!!!!!!
This is a great idea! I can’t wait to try it with letters!
This is EXACTLY what I needed to transfer the pieces of a gorgeous peacock design–I will get to use BOTH the ouline and inner pieces without the tedious almost impossible transfer of each piece!!! Thank you soooo much you have saved me a world of time not to mention an accurate transfer! My 21 yr old daughter will be so thrilled and impressed with what I have learned! Thanks again!!!
Great tip thanks!
Oh, Thank you! I have tried several things that didn’t work very well. I will try this…I wonder If I still have that Magic Mesh?
Dixie,
Magic Mesh is hard to find, but drywall mesh is readily available in Walmart, Home Depot, etc.
Do you have an update to this method as to product and if it is available in larger widths for larger vinyl projects? Will drywall aluminum patch adhesive sheets work
It is available in 6 inch widths, Duck brand, at Walmart. I don’t think the aluminum patch will work.
Thank you, I know I have used a wall patch kit that has the same mesh material as the tape but in a sheet size but that was years ago. Will keep my eyes open for it.
MIND BLOWN. Thank you. heading to 24 hour Walmart to get some now.