Using transfer tape makes aligning the cut pieces of a vinyl image simple. (If you have no idea what I am talking about you may want to watch the video on this page.) It would be wonderful to use the same technique for paper-based projects, but the trouble is that commercial transfer tape, Cont-Tact paper or painters tape tear up the surface of your cardstock cutouts when it is removed.
In my quest for a solution, I tried Press-n-Seal first. I love Press-n-Seal, it has literally saved my son’s skin during cancer treatments, but it was not the solution to this problem. Like tape, it didn’t want to let go of the cardstock without a (destructive) fight.
In poking around my boxes of never-used supplies looking for sticky things, I found some Magic Mesh, and it fit the bill perfectly. (Magic Mesh was a colored version of drywall tape popular for adding texture to scrapbook pages and cards in the early 2000s) You can also use the much cheaper and easier to find self-adhesive mesh drywall tape from a hardware store. Follow the steps below to use Magic Mesh/drywall tape to easily transfer your cutouts from mat to page:
1. Make your cuts, then remove the part of the cardstock you don’t want, while carefully keeping the parts you do want stuck down and in position on the mat (called weeding in the vinyl world). For cuts that are not clean, use an exacto knife to help you punch out the pieces and keep them in position.
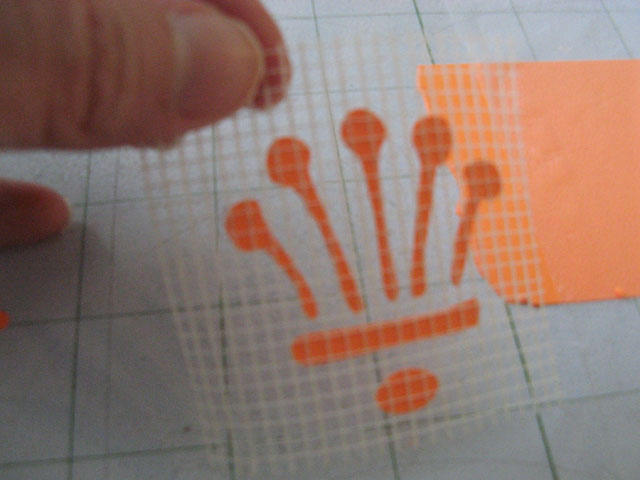
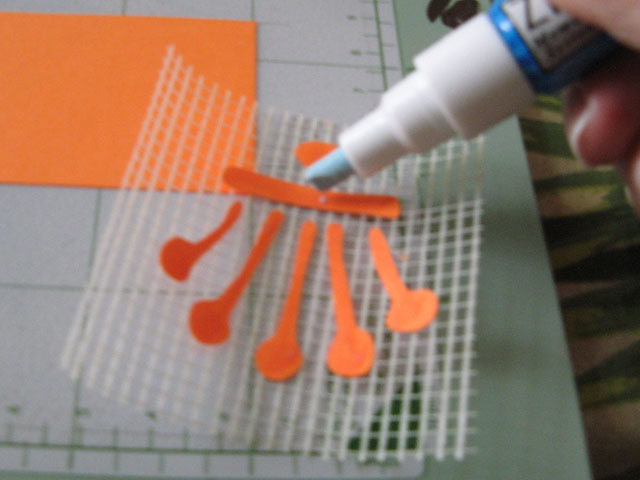
2. Loosen the pieces from the mat a little, while keeping them in position. I do this by holding down one end with my finger or a toothpick and lifting the other end with the spatula tool. You only need to loosen one end of each piece to “break the bond” with the mat. The results will look something like the photo below. Notice how on each individual piece, one end is stuck in position and the other end is “free.”
3. Put a piece of Magic Mesh/drywall tape over the image adhesive side down and press down firmly over each piece of your cutout.
4. Remove the mesh from the mat and your pieces will come with it! Now would be a good time to do a trial positioning on your page or card. If something is a little off, the Magic Mesh/drywall tape is repositionable so it’s easy to scoot things around if you need to.
5. Turn over the mesh and apply your adhesive to the pieces of cardstock. Try not to get adhesive on the mesh.
6. Position the mesh with your glue-loaded pieces over your page and press into place.
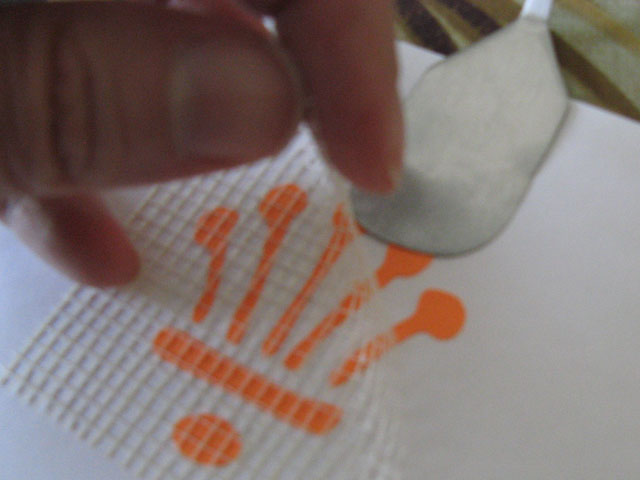
7. Wait for the glue to dry and then remove the mesh, which can be reused. Or, if you are impatient like me, go ahead and remove the mesh before the glue dries, using the spatula if necessary to assist in the process. You could also try holding the pieces down with a toothpick through the open area of the mesh.
This is really a lot easier to do than to explain. You will get a feel for it pretty quickly and be able to adjust according to the stickiness of your mat and mesh, and the surface characteristics of your cardstock. This technique should be very helpful for paper piecing (without a Cricut, line up your handcut pieces over a printed guide, then transfer with Magic Mesh), for placing lettering (with or without a Cricut, use the grid on the Magic Mesh/drywall tape to line up individual letters), and especially for text in a circle or other complicated images that need to be positioned precisely. I’d love to hear how it’s working for you.
For a video of this technique see this post.


Wow! Thanks so much for the tip. I gave up on a project just yesterday merely because of the amount of cardstock letters I was going to have to transfer by hand. This is just what I needed! Now I’m headed out to get some drywall tape and finish.
I use painters tape. The blue one. It works really well. My last project I had apply the cut to regular printer paper and didn’t rip or peel. It helps to reduce the stickiness if you apply to a flat surface a few times prior to use.
I’m sure you don’t get many hits on this page anymore, but just wanted to let you know that the link for Magic Mesh is definitely wrong now. Take a look! 🙂
Actually this remains one of my most popular posts, but no one caught that before so it might have changed recently. Thanks for the heads up!
Question for you: What is that fabulous adhesive you are using? The tip looks thin enough for even my smallest cut pieces. Glue sticks just aren’t working for intricate designs!
That is a Zig glue pen.
I have spent hours looking for this exact thing. I just recently learned about transfer paper for vinyl, then I wondered if there was something out there to do this with paper! I will be rushing out to get some of this magic mesh! Thank you so much! Can’t wait to get off from work to try this tonight 🙂
As a newbie to Cricut I find all your information so helpful. One question I have is about consistent cuts. Not all of my cuts are slicing through the paper/card stock/or vinyl. Is this normal? I’ve increased my settings to the + on all types of medium but still get a few places that aren’t cut through. What am I doing wrong? Thanks.
Hi Toni. Check your blade tip for nicks and be sure it can turn freely. Some media are better than others but inconsistent cuts can be from not enough pressure or dirty mats, too. If it persists, call Cricut support and they will help you out.
I work exclusively in paper and have been going nuts trying to find something comparable to transfer tape for my projects! Ran across this post while searching Pinterest for something else. You made my day!
This made my day too!! I just knew there had to be a way to do this, and got so-so results using paper (medical) tape that I tried to barely touch so it wouldn’t stick too tightly. This sounds even better! Ordering tape right now! Thanks, KAY!!!
THANK YOU THANK YOU!! My son decided to spray paint his presentation board with a textured spray, expecting me to cut vinyl letters and have them stick. UUgh. Last minute too, I was trying to spare him the agony of lining up a ton of small letters! I turned to Mr. Google and he sent me here. A quick trip to Lowe’s later and the presentation was SAVED!! Thank you so much for sharing!! I also found out that lower quality card stock worked better to stay together here – the 65# worked better than the 100#. The 100# wanted to peel the letter in half when he pulled the tape off a little fast – we just added a little more glue and it was all fine but just another tip that heavier isn’t always better. 😉
Super tip. I have struggled with this at times. too. Recently with wedding invitations and itinerary cards. Thank you so much.
Hi….where can I buy this in the uk. I’ve been looking on line but unable to find a supplier. have you and suggestions or links please
I can’t speak for the UK, Christine, but drywall mesh is available at any hardware store in the US.
Thank you Kay…I will search for Dry wall mesh
Many thanks
OMG!!! Would it be to forward to say I LOVE YOU! I have been searching for months and months, tried almost everything even tried dollar store bookcovers. Nothing worked as well as I wanted. SO THANK YOU, THANK YOU, THANK YOU!
Thank you. I found your post in a search. I will get this taper and give it a try.
What is this product made by? I can’t wait to use this tip. I want to buy it online and Amazon is no help. I don’t want to go to the hardware store in the pandemic. Thanks for your advice.
This is the same thing I buy at Walmart (affiliate link) https://amzn.to/2ULhtzE
I know this is an older post but I can’t tell you how happy I am to find it! I have many svgs that are great for vinyl but I would like to make smaller sizes of for my scrapbooks. Unfortunately there are so many tiny pieces that I gave up that idea. Stopping at my local Home Depot today to pick up some self-adhesive drywall tape. Thank you for the information!!!
So glad I found this! I’ll be making a trip to either Walmart or the local hardware store. I was ready to give up on a paper project and then I found this! Thank you!