I received my PixScan mat and have had a chance to play with it a bit. So here’s an update on what we know now about PixScan:
-The mat is thick. .019″ thick according to my calipers. Nearly twice as thick as a standard Silhouette mat (.010″) and almost as thick as a Cricut mat (.022″). This is important because some of us had come to the conclusion that using Cricut mats was what was causing problems when we cut vinyl without a mat. I for one, had sworn off Cricut mats, but obviously need to rethink that.
-The mat is opaque. This is an unfortunate design choice because it makes it impossible to backlight the mat to get a better photo.
-Taking a calibration photo can be a challenge. You need to light from the side so that you don’t block the light when you hover over to take the photo, which has to be from straight above. A great tip is to mount the calibration page on a wall and take the photo from a more natural position. Magnets on the fridge would be an easy solution if your kitchen is well lit. I am hearing from a number of people who simply have not been able to calibrate at all, receiving repeated error messages. The Silhouette Plus forum is building a library of calibration images so you might want to check there to see if you can download an image for your camera. Also don’t forget that some devices are precalibrated (see the list in this blog post).
-The PixScan software if pretty accepting of the image photos (different from the calibration photos), but since you still have to trace the images, a better photo (in focus, and brightly lit) will make the job easier.
-In terms of accuracy, results are all over the map. Some people are getting very impressive results, while others (even knowledgeable ones) have a good bit of “white sliver” showing. This doesn’t surprise me because there are so many variables. I can’t get my mat to lay perfectly flat, for instance, and I know that throws off the correction. I expect this to be a bigger issue as mats wear.
-PixScan, as we expected, is simply not as accurate as standard Print and Cut. SA recommends using an inner offset to eliminate white slivers. I would recommend either an inner or standard offset and a design that is forgiving of minor mismatches. If you demand pinpoint accuracy, PixScan is likely to disappoint you. And don’t spend a lot of time tweaking and point editing your trace because it isn’t going to be worth the effort.
-Mat loading position is essential for getting registration marks read. The left edge of the mat should not cover the mat loading guideline on your machine. Don’t be surprised if you have to try multiple times. Hopefully this will be corrected in a software update.
-PixScan works fairly to very well with a camera, but not with a scanner. It is difficult if not impossible to get a proper set of scans that will automatically stitch together and in the process you expose your scanner bed to mat adhesive and your mat to possible creasing from the scanner lid. Detailed instructions might help, but there are none available to date. Hint: set your scanner area to A4 and scan the entire right or left side of the mat first.
-The PixScan layer can not be toggled off to make it easier to edit trace lines. Another example of poor implementation of layers in V3 that I hope will be corrected in future versions.
-My advice, scan your image without the mat to obtain the cut lines as you would do without PixScan, then use PixScan to determine the correct position for those cut lines. This adds steps, but gives you the best of both worlds for an overall less frustrating experience and better results.
-In my opinion, Silhouette’s PixScan technology has rendered the Brother ScanNCut obsolete. Kudos for a great idea that makes Silhouette’s otherwise mediocre software a player again.
-Despite the issues mentioned above, I am excited about this technology and the ways it expands what we can do with our Silhouettes. I’ve already been putting it to use and will be reporting on the things I think it works better than existing methods for.
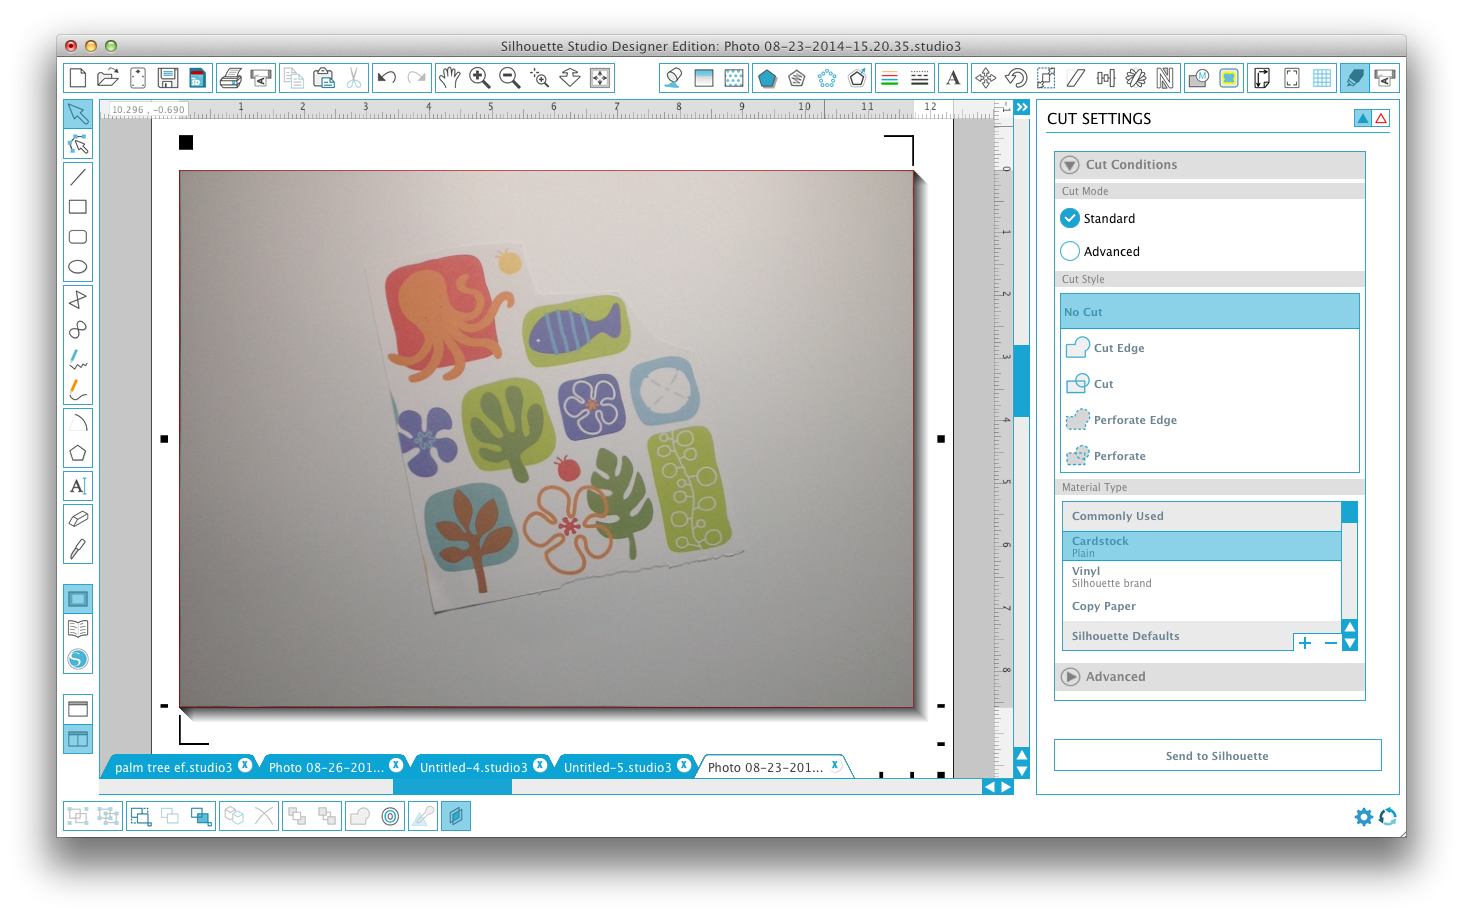
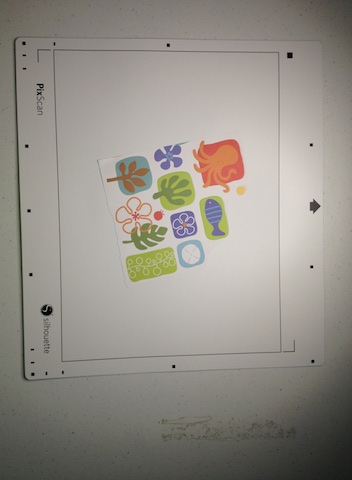
My image photo of scrapbook paper on the PixScan mat using precalibrated iPhone 4s. Note that the image photo needs to include the entire mat, but can be from an angle.
As imported and interpreted by PixScan

Cut lines added by tracing (no offset applied)

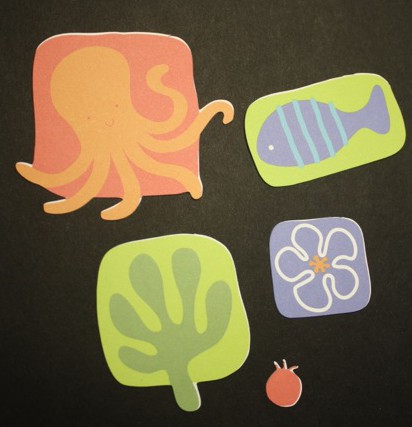
Resultant cuts


Kaye,
Thanks for this great information. Would you consider doing a tutorial on “then use PixScan to determine the correct position for those cut lines.” I scan images now, and make then create the cutlines, then PNC the regular way. But, not sure how I would use PixScan to determine the correct position for those cutlines.
I got my PixScan mat and used with my iphone 4s the first time had great results. But, since have not been able to duplicate the results. My normal PNC calibration is right on.
Sorry for a duh monment on what you are trying to show us with “using PixScan to detemine the correct position for for those cutlines from scans.”
Thanks Linda V
Thanks once again for great info, Kaye.
I am still holding out on updating to the 3.xx version until more bugs are worked out. I’m too busy trying to learn more about the version I have–don’t want to spend time learning a new version that doesn’t work right; learning “work-arounds”; then un-learning work-arounds when they finally get it fixed and having to learn the right way!
I appreciate all your feedback.
Judy
What is the advantage of using this vs a scanner? Thank you!
Carla, I answer that question in this post http://cleversomeday.wordpress.com/2014/08/06/pixscan1/
Thanks Kay for sharing your experience with PixScan. I got my mat and my first cut was off. I’ll keep trying. Thanks for any advice. Lots of us appreciate you!
I second everything you said. Thanks for the tip about mounting it on the wall. I too have had “sliver” problems, and I HOPE they will soon allow you to toggle off the image layer. I so appreciate all your hard work figuring this stuff out and sharing it with the rest of us!
I’m still with the old version, have’nt got 3.0 and don’t think i want it – or the pixscan –
Thank you for taking the time to write your results and recommendations. I’m very happy that SA has developed the Pixscan, even with the needed improvements. I’m a quilter and I’ve been able to use scrap fabrics on the pixscan mat, scan it and place my applique shapes on it and cut them. It’s been great to use my small pieces of fabric.
Robyn
Thanks for th Pixscan info. You are the best. I have still not updated to any of the version 3’s. I am afraid to. Are there any videos or help on this process if I decide to go for it? I can’t find any videos from Silhouette. Thanks Kay.
In your article you mention ‘the mat loading guideline on your machine’ but exactly where is that? Can u send me a pic of it? Thx and keep the tips coming. Thanks for your talent. nancy at centralva dot net
Nancy, The first photo at this link shows the mark. Its hard to photograph. http://www.silhouetteamerica.com/faq/solution/cutting-mat-drifting-during-cutting-operation
Thanks for the info.
Kay, I was wondering if you could do another post on the state of v3 and whether it is recommended to upgrade now? Some of the missing features on your last list were pretty significant so I’d really value your opinion again now that we’re in the v3.1 level. I don’t have a scanner, so Pixscan is desirable to cut out stamped images with a camera image, but not if I’m going to lose basic functionality. Thanks so much, your blog is the best!
Kay, I recently purchased ones of these mats and what helped me to celebrate my phone and camera was to use Picasa to crop, straighten, and enhance my photos. Both were added with no problem.
Thanks for your tip. In general, cropping is not recommended because of aspect ratio issues, but if you know how to crop without changing the aspect ratio that is definitely a big help.
How is it that folks are so forgiving when a technology used to SELL the machines and software DON’T WORK? This is a huge marketing tool for these people, and it ISN’T cheap to buy. It doesn’t work, they refuse to help people, don’t answer questions and ignore the frustrated people on their facebook page. WHY IS EVERYONE BEING SO NICE ABOUT THIS. Is this where we are as a country that we no longer expect to get what we pay for??
Missy,
This feature seems to be working well for many of us and not at all for many of us and I haven’t been able to determine what makes the difference. If you are having issues calibrating (the most common problem) then I recommend trying the scanner method which is easier and more accurate. The key there is to set your scanner to A4 size so that you can capture the entire length of each half of the mat.
I just received and tried my Pixscan mat today. My initial problem was not reading registration marks due to not having the mat size set correctly (operator error). Once I figured that out, it works really well, with the exception of some white sliver issues. IT”s just good to know that others are having the same problem and there’s noting I’m really doing wrong. It is disappointing though, that for all this trouble it doesn’t cut more precisely. Thanks for all your help on this and so many Silhouette topics!