Its been over 3 years since I first tried matching print files to embossing folders and it was such a pain that I left it alone after that. But now that Darice is publishing nice black and white previews of their embossing folders, I decided to brave it again. Each of these is a lot of work up front, but once the template is done, you can crank out a lovely, customized card in minutes.
The Banner folder from Paper Studio (Hobby Lobby house brand) is so versatile, and I love using it with this technique. Graphics are from the Bicycle Craze collection by Lettering Delights.


Here are a few more I made with the same folder while I was experimenting

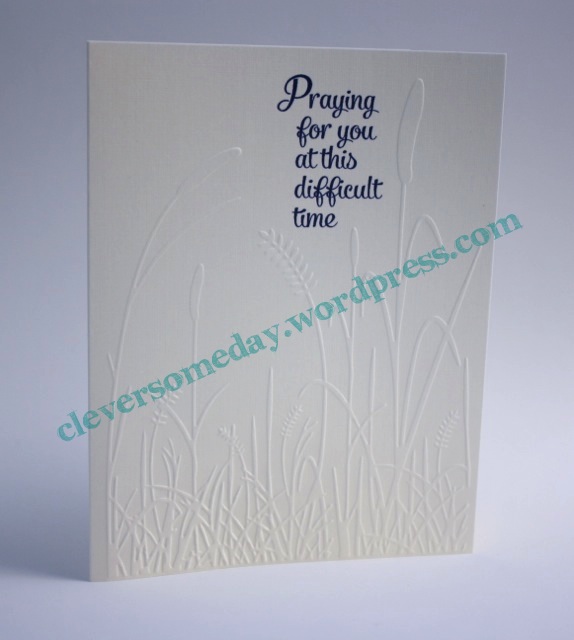
You can make a simple template just for positioning text between embossed areas, as I’ve done here with the Darice Grass folder and still get a stunning look.
Or you can go all out and print the entire embossed area like this. The photo just does not do this one justice, but even so don’t expect 100% perfect results because the paper deforms as it goes through the embossing process.

Changing colors only take a few clicks.

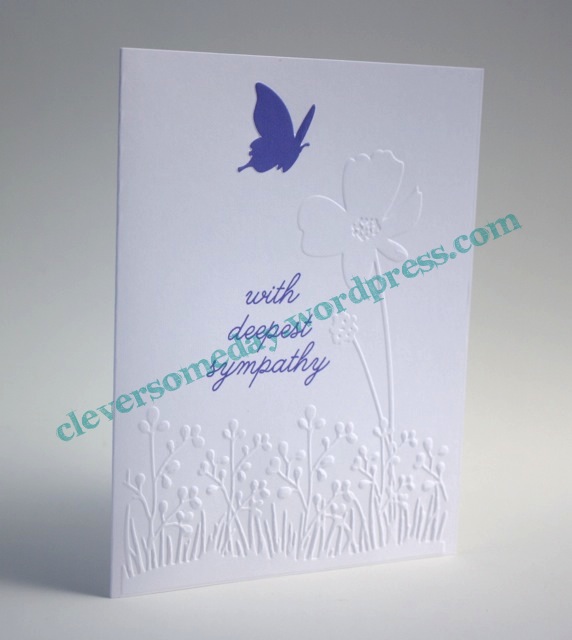
Once you have a template, you can pick out just one key element to print if you like, as I’ve done here with the Darice Butterfly on Flower folder.
I used the same idea here, with the Darice Bird on Branch folder except that I used the sketch tool in Silhouette Studio to give the bird a hand drawn look.

And I think this card I made with the Darice Boot Tracks folder is my favorite. This is an unusual, inverted folder so the boot prints are indented instead of raised. Wouldn’t this be great for Operation Write Home?

I will be my sharing templates soon, but wanted to go ahead and get this posted, so please check back. And if you can help me spread the word with a pin, tweet or FaceBook post, that’d be most appreciated.
Update: tutorials are here!

You really are a genius!
wow! amazingly informative and inspiring post. thank you so much!
and I’ll be sure to share as well!
I’m the manager of the Quietfire Design, Design Team. Might you be interested in being a guest designer? take a look athttp://www.quietfiredesign.ca/, and Suzanne Cannon is a featured designer at Silhouette.
thanks
I’d love if you shared your templates, I thought of doing this awhile ago (when seeing the Hero Arts stamp/embossing combos actually) but wasn’t sure I’d have the patience to get it right… I think I’ll definitely try again I have a ton of Darice folders 🙂 As always, thanks for your genius!
Kay, thank you! I have learned so much from you. Your instructions are always so clear and easy to understand. You are so creative.
Kay, you are such an awesome teacher!!! Thank you for what you have done and are continuing to do for the Silhouette community. I have learned so much from you and a few others over the years. I look forward to learning even more. hugs, Patty
Blog Updated on 1-16-14
rosetresuresblog.blogspot.com
This is just staggering. I own so many embossing folders (various brands) and my wheels are already spinning with what some of them could look like when used in this treatment.
If you would consider a how-to demo of this as a subject for a future tutorial, I would be over the moon.
Thank you for all you have taught and continue to teach the crafting community!
Yes, Carol, already working on a tutorial.
I’m not sure just yet about what you are doing here but it is lovely and I will be interested in finding out what you are doing. Thanks for your generosity.
Thanks so much for generously sharing your expertise with us!
Kay, you’ve done it again, inspiring me to try something else. Thank you for trying this again and succeeding and sharing the results and info for the rest of the crafting community. Karla
Kay, I am looking forward to this tutorial! I am trying to figure out how to scan the image into my Silhouette ( with my existing folders) for the trace. Sure wish I had saved all that packaging, especially the Darice ones. This is a great idea for new purchases!
Trish,
Do a Google Image search for the Darice ones. Their marketing images are nice crisp black and whites for the newer ones. Makes this a whole lot easier.
Wow!!! You are so talented. Thank you so much for sharing this information
Love them Kay, I have 2 shoe box’s full of embossing folders can’t wait for the tut. Thanks
I would totally pin this if I knew how. If there were a pin button, I could push it, but otherwise I do not know what to do.
I love the idea and would love to share but unfortunately I am in the same boat as Tamara above, I have no idea how to pin it without the button being there. I can’t wait to see the tutorial.
Can’t imagine how wonderful these samples look in person! Will definitely be watching for your ‘How To’!
Jan
Your cards are amazing, Kay. I look forward to your tutorial. I can not begin to tell you how much I have learned so much from your videos. Thank you for all you share.
Wow! This is so exciting! What a great idea for putting our embossing folders to better use. You are my Silhouette Guru, and I always look forward to your fabulous ideas. I’ll certainly be watching for your next post! Thanks a million!!
I am looking forward to seeing your techniques very much! I love embossing as much as I love my Cameo!
Great idea. I’ve got a few embossing folders and will give this a try. Thanks!
Wonderful ideas! Thanks.
Such a fab idea and can’t wait to try it myself x
This is amazing. Thank you for sharing.
I just pinned, but don’t get the process at all. Are you embossing then coloring? And then printing another image? Guess I’ll need to watch the tutorial too.
It’s much simpler than that. I use graphics software to design and print the card to coordinate with the embossing folder, then emboss the printout with that matching folder and I am done. There is no stamping or additional coloring involved. Hopefully the tutorial to come will clear things up for you.
Thank you for this! I don’t fully understand the process, but I certainly appreciate the lovely projects you’ve created.
Fabulous cards!! But I’m also a bit confused.
“Kay:: January 19, 2014 at 11:36 pm
It’s much simpler than that. I use graphics software to design and print the card to coordinate with the embossing folder, then emboss the printout with that matching folder and I am done. There is no stamping or additional coloring involved. Hopefully the tutorial to come will clear things up for you.”
I think I understand this part:: I use MakeTheCut to trace the black and white image which I then recolor or highlight or sketch and then print that item. But then I’m confused…what’s an embossing folder? How do they get on my computer and in a box? When does it get cut by the Cameo?
Eagerly looking forward to the tutorial!! 🙂
Hi Tracey,
The Cameo is not used in these cards. The embossing folders are storebought, made of plastic (pictured in first photo) and used with an embossing machine (Cuttlebug, Big Shot, etc.) to texturize the paper. Here’s a general tutorial on folder embossing that may help you http://52sketches52weeks.ning.com/forum/topics/tutorial-using-embossing.
Thanks for the reply! I think I got confused when I read “MTC” and then assumed “Cameo”. But you just used it to trace and print. 🙂 THANKS!