My latest web app crush is squarely on Stencilizer, a cool online tool for automatically posterizing, smoothing, vectorizing and color separating photo input. Upload an optimized (clear, close up, cropped, background removed, high contrast) image and Stencilizer first presents you with 9 choices in various brightness levels and number of colors.

Choose your favorite and then Stencilizer yields up to 5 SVG files ready to download, cut and layer.

In addition to its intended purpose of making layered stencils, I see at least 3 more ways the digital diecutting community can put this tool to use. First off, if you are familiar with the stunning Paper Portraits by Greg over at Paper Kutz Studios you may have wished for a lazy crafter’s version. Stencilizer gives you that.
The Stencilizer output is not nearly as detailed as what you would get through the meticulous methods Greg generously shares in his tutorials, of course, but should work fine for smaller projects, greeting cards, etc. Though I haven’t tried it yet, I can foresee combining the Stencilizer output with Greg’s advice on paper colors to create some nice pieces.
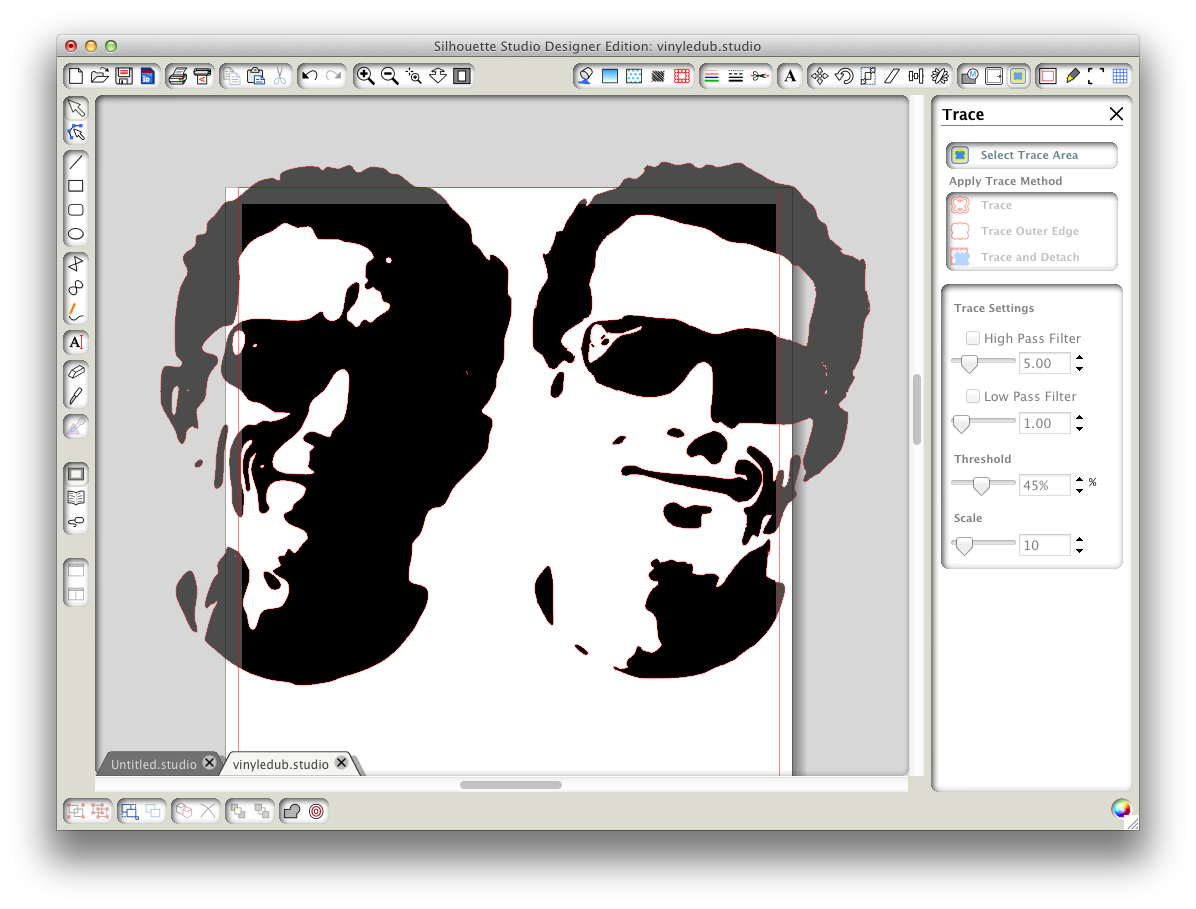
Secondly, rendering photos in vinyl for tiles and for etching on vases, etc is very popular. File creation has been a challenging proposition, though, as most crafters lack the image editing savvy to translate a photo into a single color cut file that is recognizable, much less flattering. While the SVG files from Stencilizer are not suitable for vinyl work, the enlarged previews it generates are adequate for tracing.
I’ve put together a video tutorial on how you can use Stencilizer to make cut files for vinyl. In it I use Silhouette Studio for the tracing, but any cutting program or Inkscape would do the job just as well if not better.
Though not diecutter related, I will mention (since it happens to be October) that you could use Stencilizer in this same manner for custom pumpkin carving designs. Assuming the black will be cut out, be sure you add “bridges” so that you don’t have any white completely surrounded by black.
Thirdly, Stencilizer works well for the posterization needed for the hatched sketch technique I recently posted and for other projects such as glitter/sand painting where areas of discreet color need to be delineated. The SVG files Stencilizer generates are meant to be stacked, so they will not work for this, as we can not have hatching layers overlap, but once again, the previews can be traced with good results.
I’ve made a video on using Stencilizer as part of the sketching process, too.
Finally, let me mention that Stencilizer’s revenue stream comes from sales of custom cut paper stencils. Since those of us with our own diecutters will not need to buy stencils, I encourage you to take advantage of Stencilizer’s donate button if you find the web app useful.


Do you think you could etch using this program?
Yes, the first step in etching is vinyl cutting so the process is the same, except that you use the negative (weed out the middle).
Thanks again for the great information. Love love love what you post. You seem to find hidden gems for the rest of us die-cutters. You are the greatest!
Hi Kay,
So cool – thanks for sharing, I’m def going to check this out. I want you to know also that I’m featuring one of your sketches on my blog tomorrow for Debbie, Kelly and My’s Mini Blog Hop! Hope you’ll come see!
Blessings,
Barb
Kay, thanks for the mention in your post. I’m glad to here that people still like my portraits. I might have to start making some new paper projects in the future.
Wow – Kay! I haven’t been on your blog in a while, so I thought I’d drop in while taking a break from working on plans for my daughter’s baby shower. I had been trying to figure out how to make stencils for shower guests to use to paint onesies for a game/activity…and here, once again, you have bailed me out! Thanks for the great tip! (Love the portraits, too!!)
Thanks! I do both acid cream etching and sand blasting. Stencilizer will really help with getting to that high contrast image that is cuttable. And a nice little plus is that the photos don’t necessarily have to be of people. Could be dogs or cats, flowers, or a still life like an old well or barn, or a stately tree. Lots of possibilities. TFS!
I just saw this post. Thank you so much for taking the time to put together some great tutorials for awesome programs you find and share with us. =)
I’ve used printed paper patterns to carve pumpkins and wanted to carve the faces of my family (pets too). This looks like it would assist in creating the paper patterns from my photos. Thanks!
Totally awesome, your video is very clear.
Great tutorial, and very helpful.
can you providw a link for silhouette studio?
http://www.silhouetteamerica.com/software/silhouette-studio
And now they are gone like stencilgram w/o a note even
stencilizer has moved to BayStencil.com