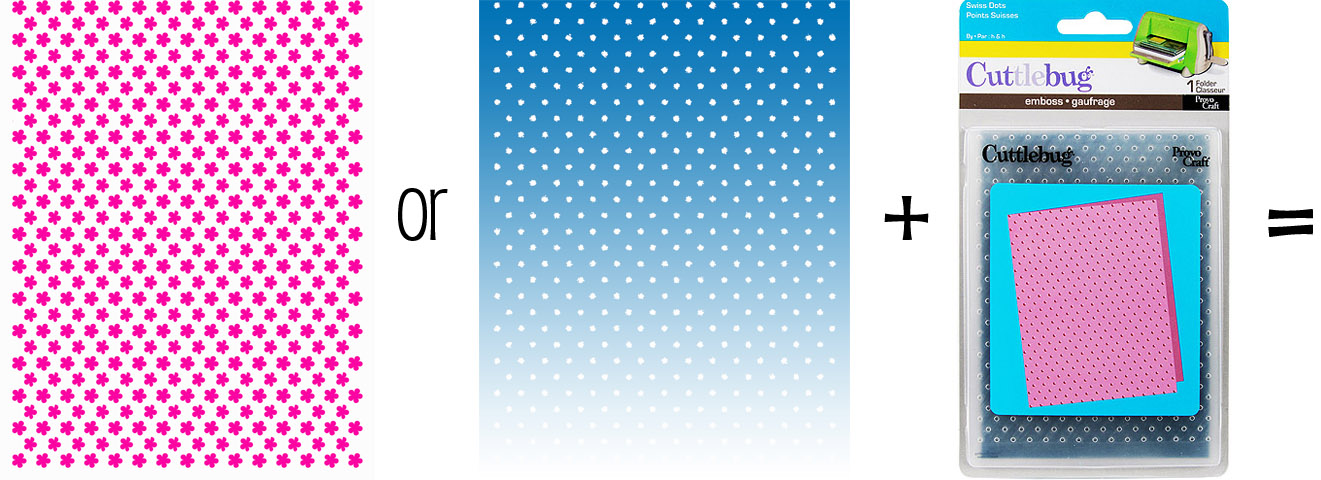
After seeing all the “companioning” going on with stamps and embossing folders and stamps and punches and stamps and dies, I decided to make some digital stamps and backgrounds to go with tools I already have. Thought the Cuttlebug Swiss Dots Embossing Folder would be an easy place to start, but I was wrong. I am not much for giving up, though, so hours later, I finally succeeded with the results you see here.
Here’s how to reproduce my results:
– Download the PDFs here Pink Flowers or Snow Gradient.
– Print at 100% size (make sure any automatic scaling is turned off) on heavyweight paper or card stock.
– Trim the printed portion at the top and sides so it will fit in the folder and your machine. Leave excess paper at the bottom of the image so you will have something to hold on to.
– Load the sheet into the Cuttlebug Dotted Swiss Folder with the image and the flat side of the folder facing you.
– With the folder at least slightly open, position the page so that the dots on your image align with the holes in the folder. This will take a little patience, especially if your folder is warped from wear like mine is.
– Carefully close the folder while holding the paper in place so that it does not slip out of position.
– Continue carefully loading the embossing folder between the required plates so that the paper does not slip, and run it through your embossing machine.
– Remove the embossed printout, trim and sand as desired (I sanded the flowers shown above, but left the snow as is).
And if you are a digital enthusiast who likes to change colors etc., you can download the .png files here, suitable for tinkering.
As always, hope you enjoy this and make great project, which you will share with me so I can link back to you.


What an awesome idea, thanks for sharing:)
eeek! I love this. Thank you.
Thank you for sharing your hard work. What a terrific idea.
thank you so much for sharing your talent….
thanks so much I am looking forward to trying this!! You are amazing! I appreciate all the hours put in to your shared projects!!
Oh, what a treat! Thank you! I love this idea!
These are awesome! I finally got a new computer and can’t wait to try all the stuff I bought and downloaded before the other one crashed!
Thank you Kay – these are great!
Fantastic creative idea. TFS
Thanks, Kay…can’t wait to try this with my favorite embossing folder!
Wow, so much hard work. TFS!
Oh, Kay, I love these! I know it took hours and hours to do – thank you for sharing it so graciously.
I am following your directions, but cannot get it to the right size. Is anyone else having this problem?
Use the PDF version and be sure you dig through all the print dialog screens to turn off anything that could alter the size. No one else has reported problems.
I can’t believe I am still having problems when no one else is. I am not new to the computer or using PDF. I have tried printing the size 4.37X5.75 and 81/2 X 11. The dots don’t match each other, and they don’t still don’t match the Cuttlebug embossing pad. Thanks for your time to try to help me. I was expecting an e-mail, now I know that I need to check back here.
Hi again Marie. Can you tell me what software you are using to open and print the PDF? I am printing with Adobe Reader where Page Scaling is set to “None” and “Auto-Rotate and Center” is checked. That works for me no matter what the page size or orientation is set to. If you are using different software I will try and find the settings you need.
Thanks for sharing! This is a great idea!
I am using Adobe Reader 9.5. It was set with the page scaling to “none” and I checked the Auto Rotate and Center…which I had not done before…and still it does not line up with my
Cuttlebug Polka Dots.
I am beginning to think my Polka Dots folder and your Swiss Dots are two different folders?
I checked on the Provo Cuttlebug site and there is only the Polka Dots.
Yes, Marie, they are different. “Swiss Dots” is the name of an A2 folder (as shown in the image at the top of the post) whereas Polka Dots is the name of a different 5 x 7 folder.
http://main.cricut.com/shopping/detail–Cuttlebug-A2-Swiss-Dots-Emboss-Folder-0-545.aspx
Sorry for your trouble.
I will probably take this one back to Michael’s. I only purchased it because of your flowers and snow. I’ll keep a lookout for the Swiss Dots. Thank you for your trouble.
Hi Kay…I was excited to find this but it will not open in Adobe Reader for me…it gives me an error message that the draw did not work.
Mary,
You probably need to update your Adobe Reader or try a different program to open the PDF, like PSE, PSP, Preview, FoxIt, etc.
Kay – it hurts my head to think of the difficulty it was for you to perfect this! THANK YOU! I love it! And the faux Versamark? WOWWY! You’re amazing, girl!
So clever!! I love your ideas!
These are so neat! I just ordered a cuttlebug so that I could use these files! 🙂