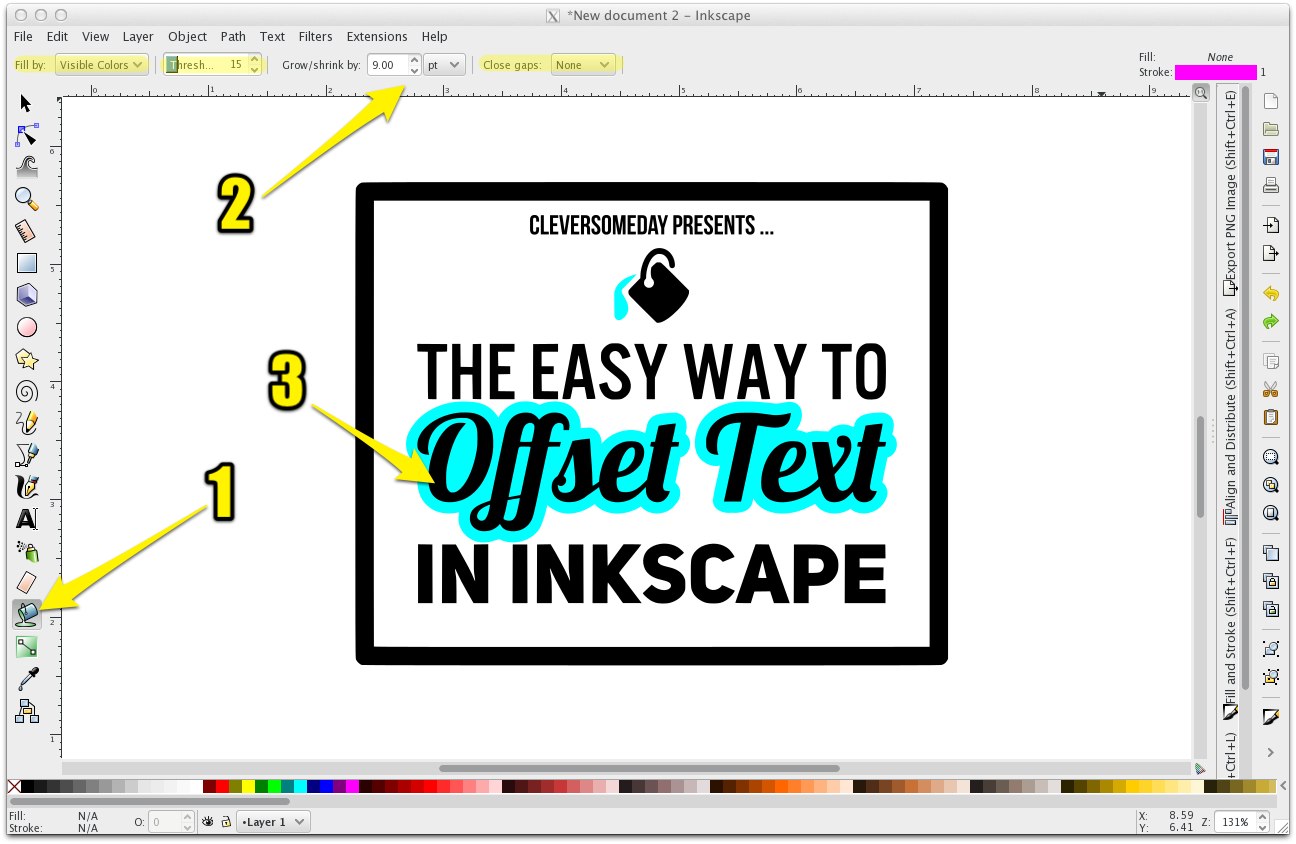
I’ve found yet another way to take advantage of my beloved Paint Bucket Tool in Inkscape…this time as a shortcut for offsetting text or any solid shape. (Offset is used for many purposes, including making shadow or matte layers, thickening up thin or delicate fonts, and creating knockouts, etc.) This technique is very simple but I’ve made a video, as well as step by step instructions for those of you who might not already be familiar with this tool.
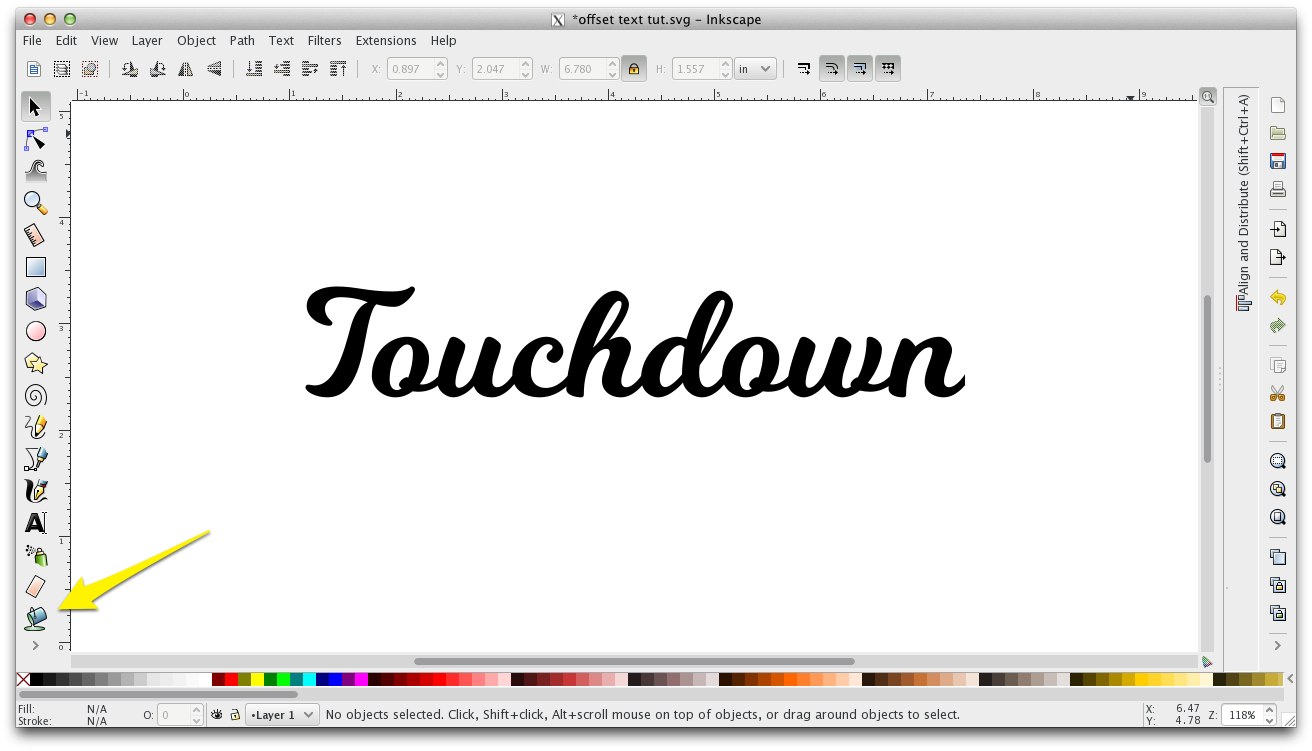
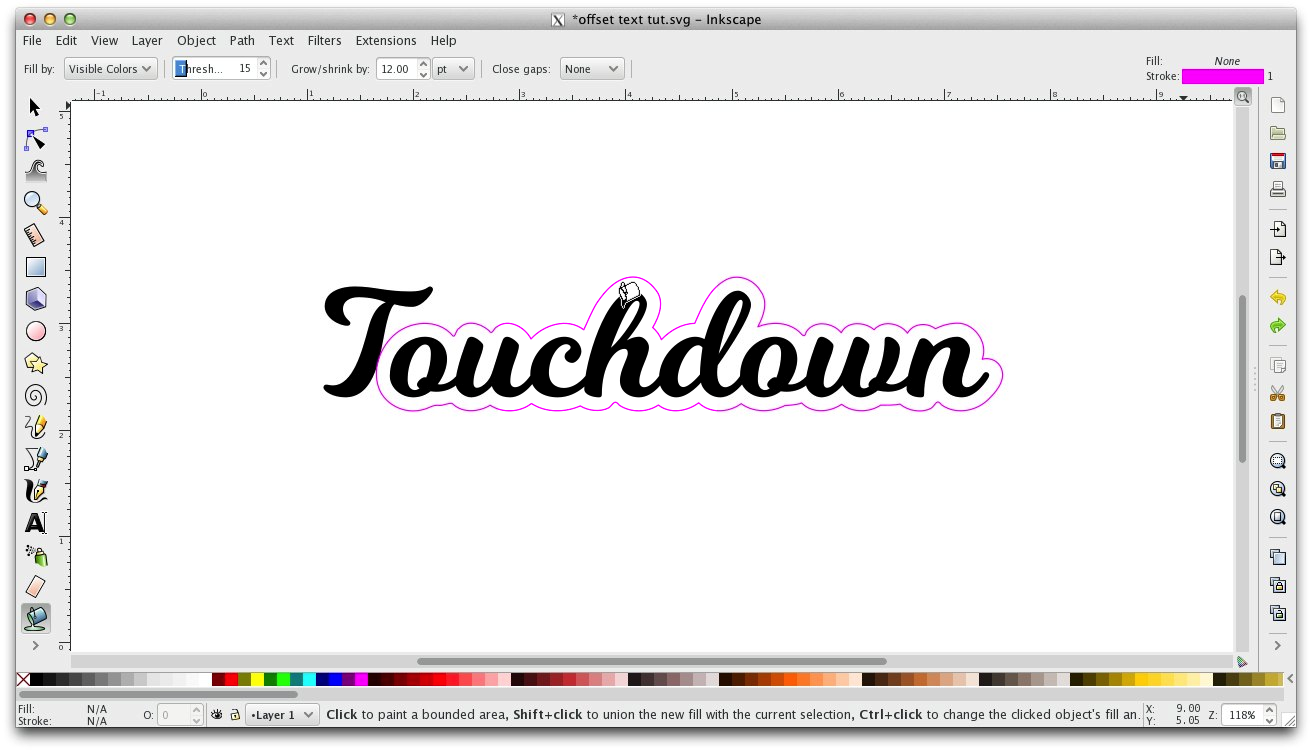
Open Inkscape, select the type tool and enter your text, change the font and size as desired. Select the Paint Bucket Tool.
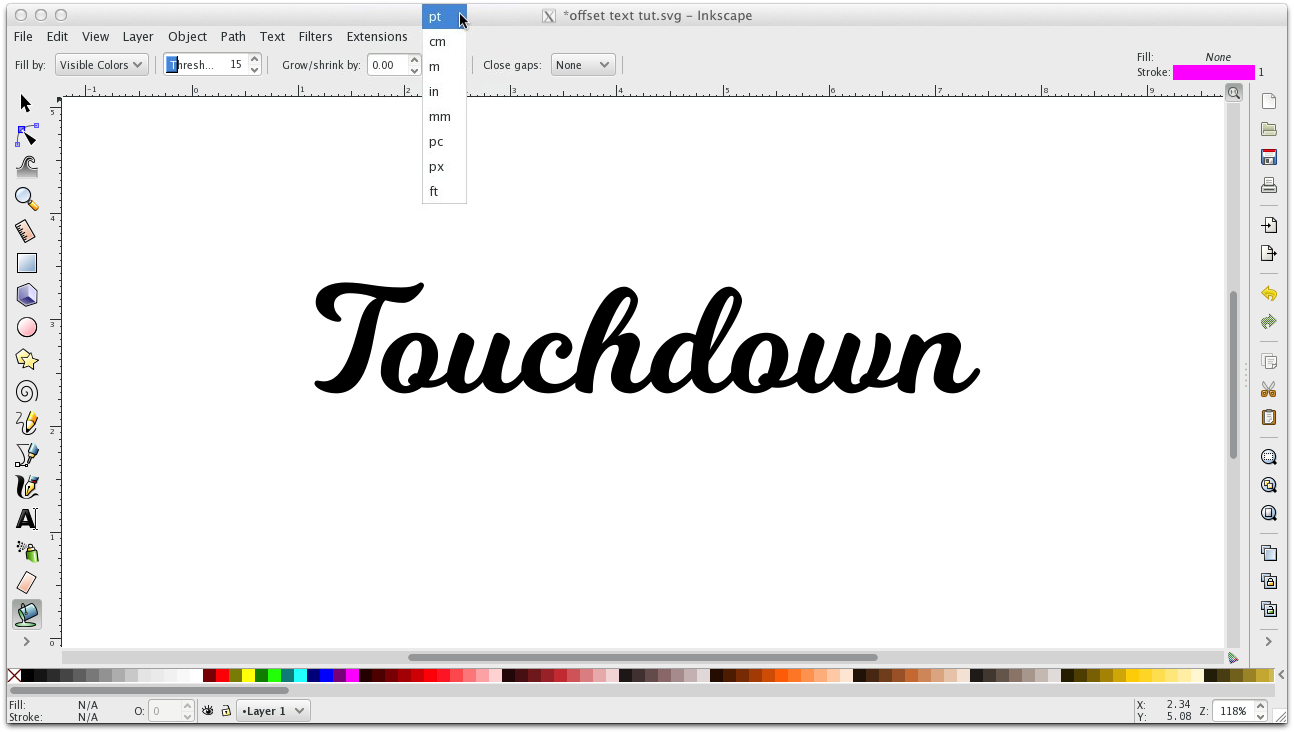
Check that the Fill by setting is on Visible Colors, the Threshold is on 15 and that Fill Gaps is set to none. Change the units under Grow/Shrink to pts.
Set the numerical value to a starting value for the width of your margin. (72 pts = 1 inch; 36 pts = 1/2 inch; 18 pts = 1/4 inch; 9 pts = 1/8 inch)
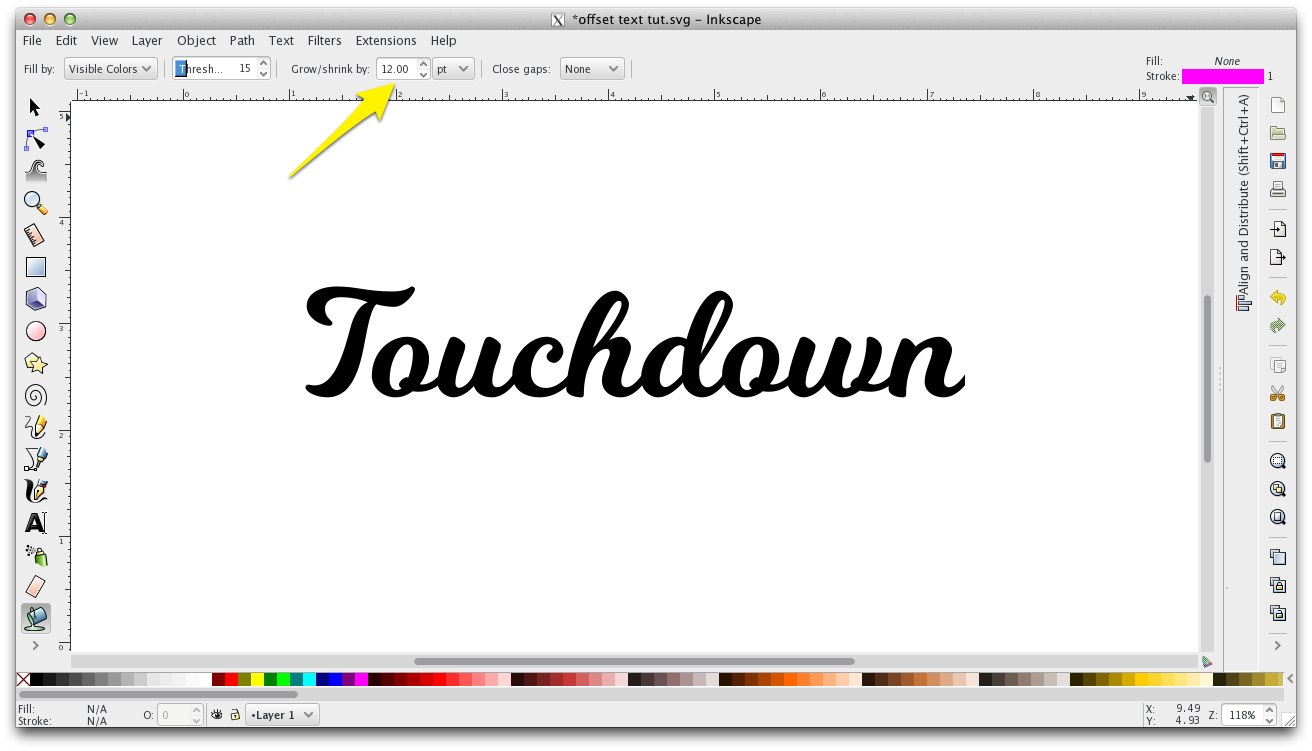
Click on a solid portion of your text. Undo and adjust your pt value as desired. If you get a solid shape instead of an outline, either change its attributes using the color swatches at the bottom of the page (click on the x swatch for none, and shift click on the pink for the outline) or set your defaults as I show starting around the 1 minute mark of the Paint Bucket Basics video below.
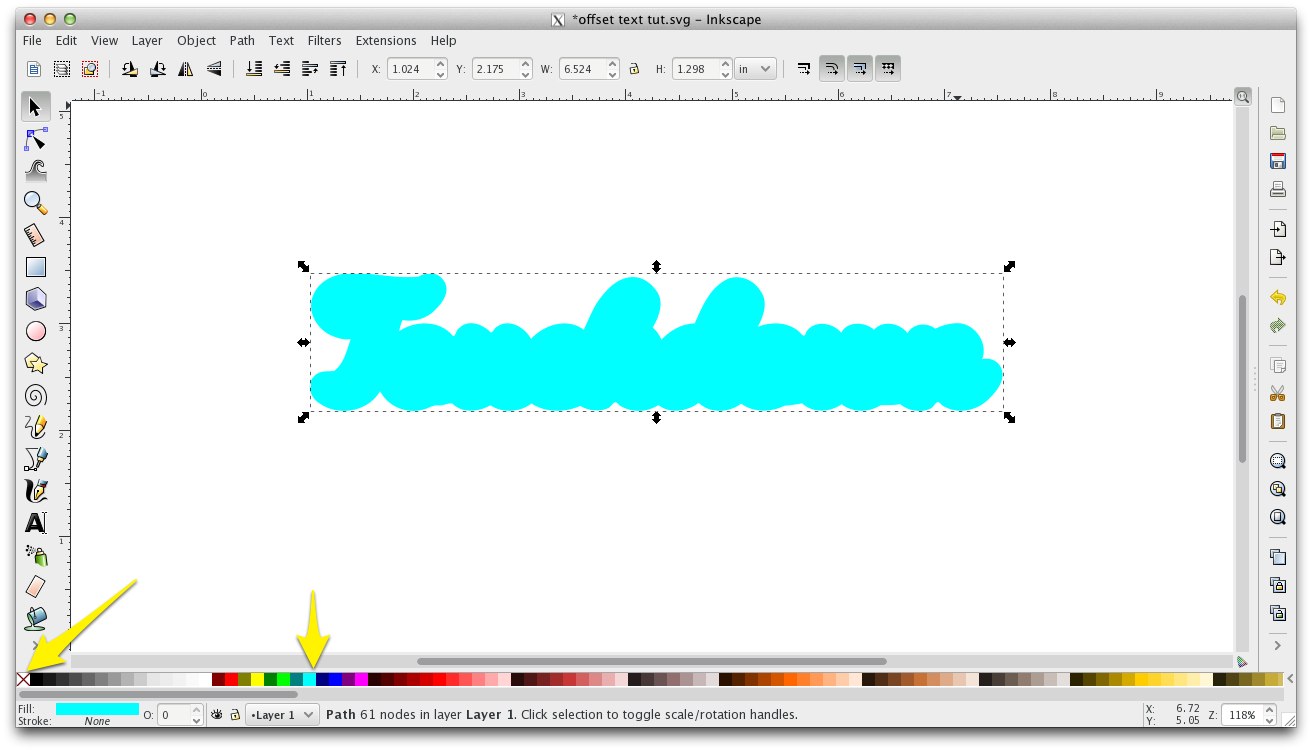
Shift-click each additional section of text with the Paint Bucket to add to the offset.

Double click the offset to enter point edit mode and delete points of any unwanted inner pieces that may have resulted from the offset process.

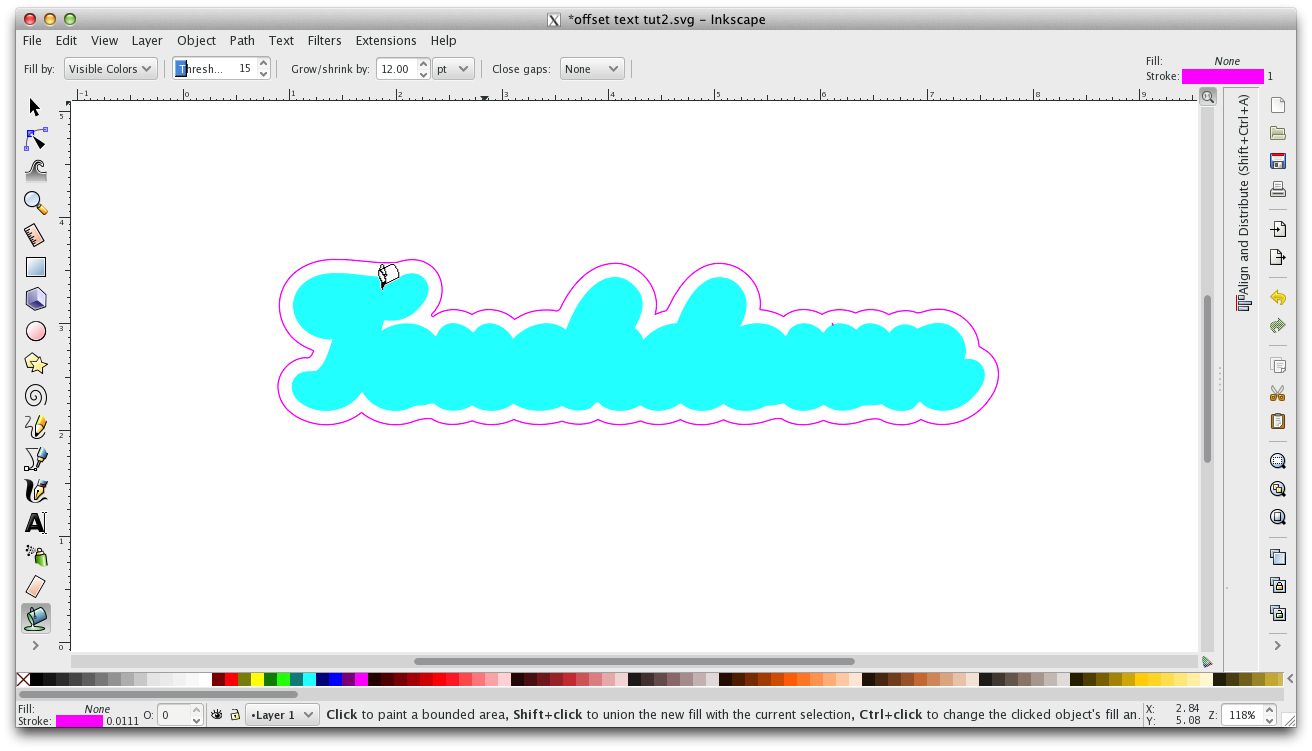
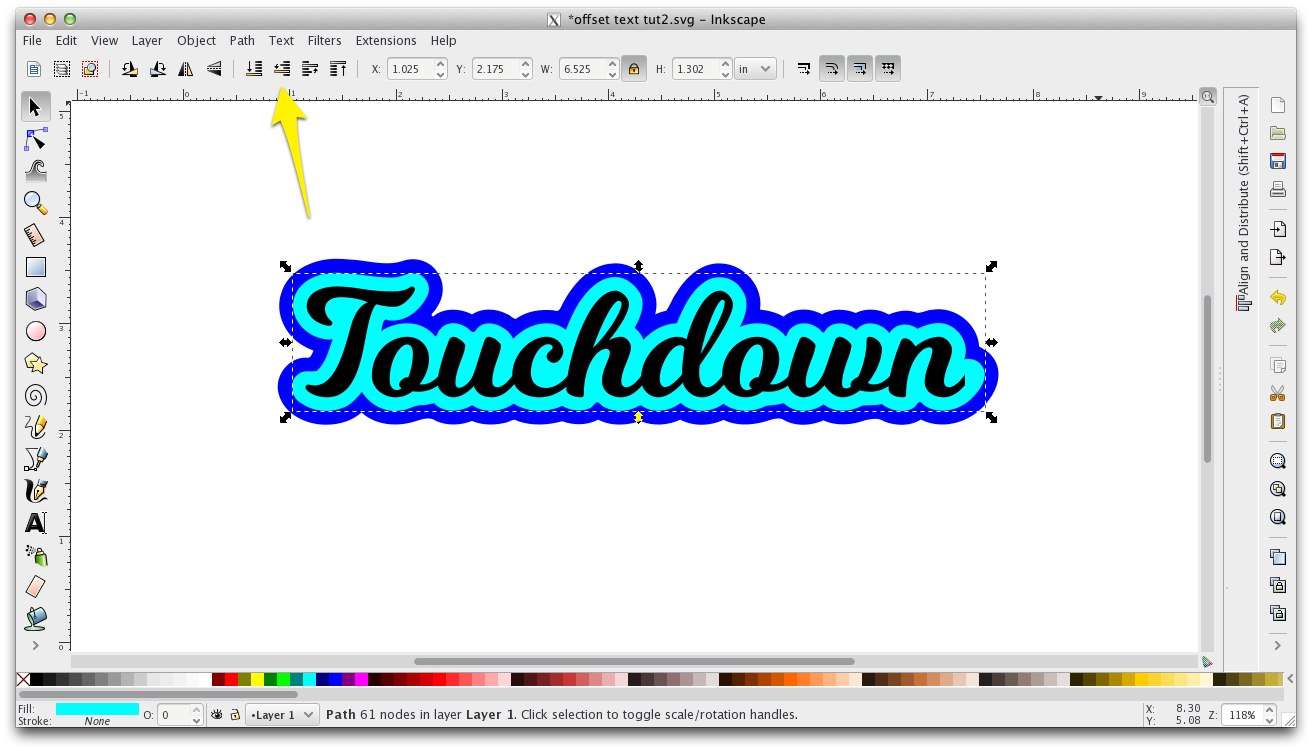
Click the selection arrow to exit point edit mode, then click on a color swatch to fill your offset with a color and shift click the empty (X) swatch to set its stroke to none.
Click on the filled offset to add another layer.
Change the color and stroke of the new layer as for the first one. Click the Send to Back button.
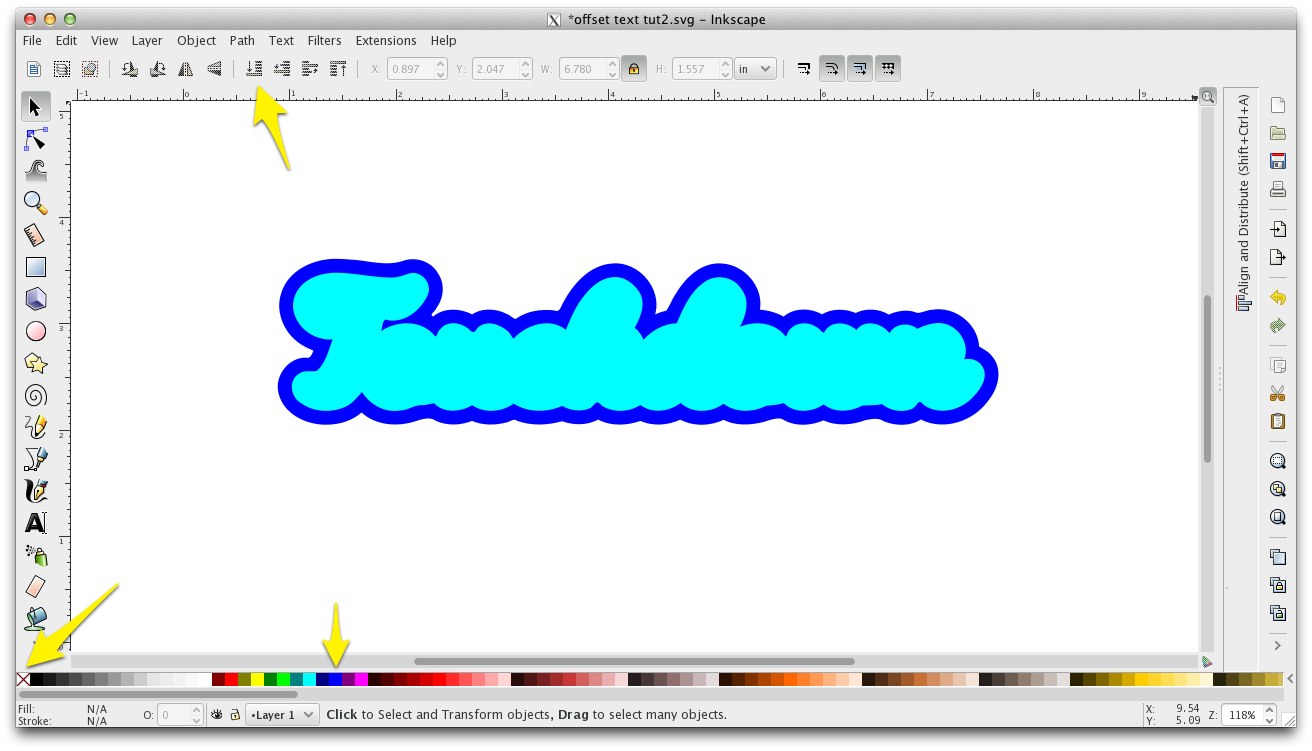
Select the middle layer and click the Lower Selection One Step button.
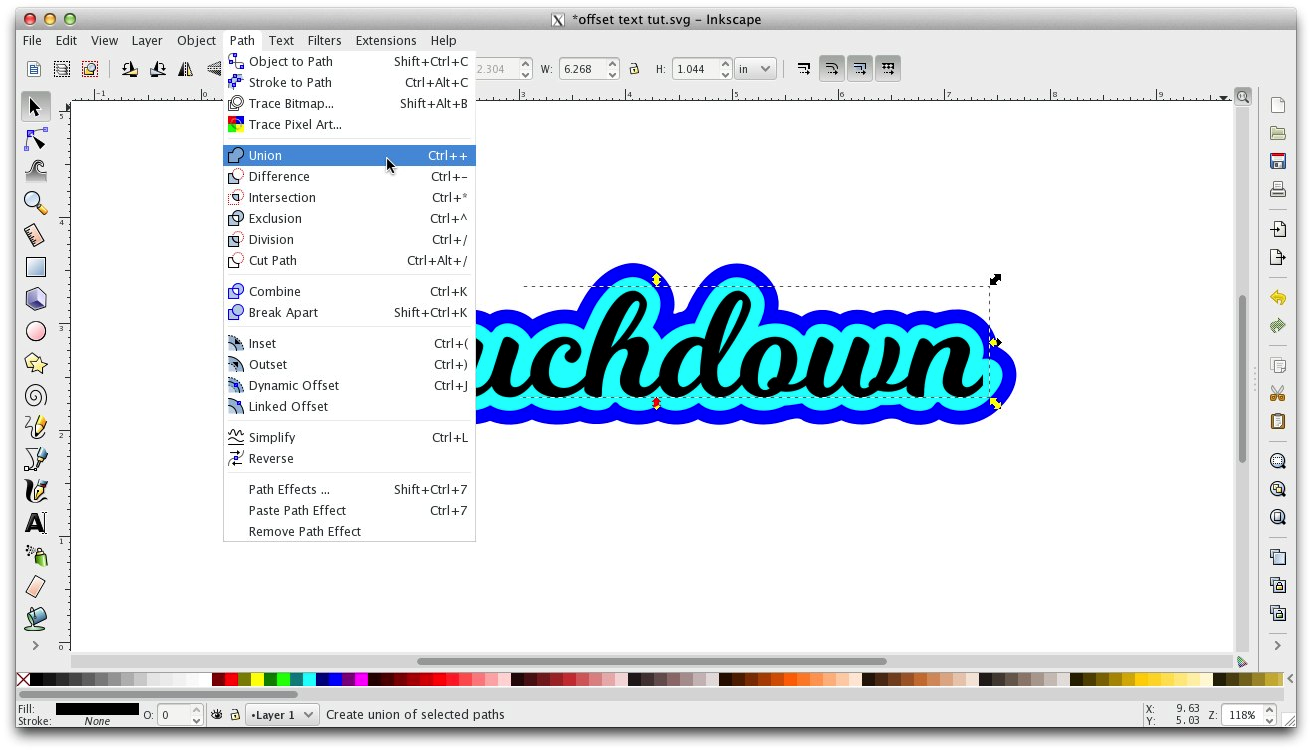
Select your original text and Path>Union to change it from text to path (you might want to make a copy of it first because it will not be editable as text after this step).
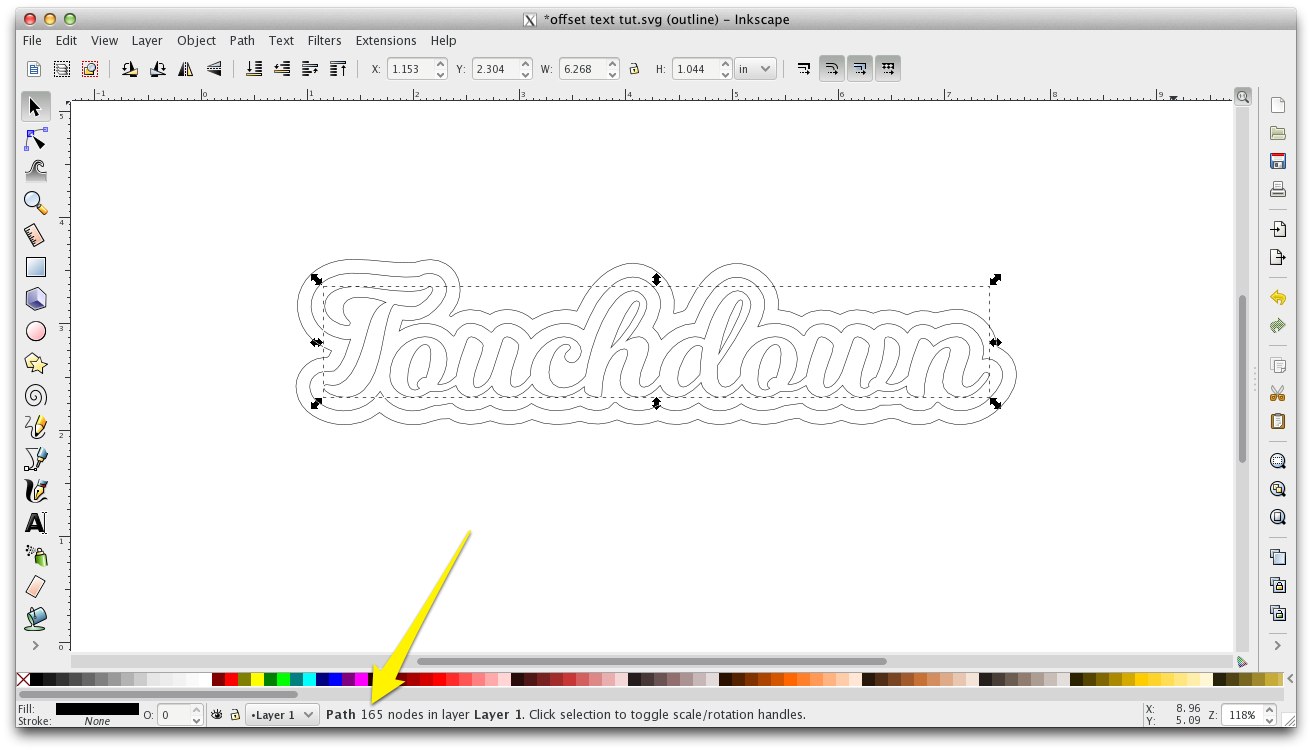
Check your file in Outline View (View>Display Mode>Outline) to verify that your cut paths look correct (solid text indicates it has not been converted to a path). The status bar is another good way to check information about any object in your document.
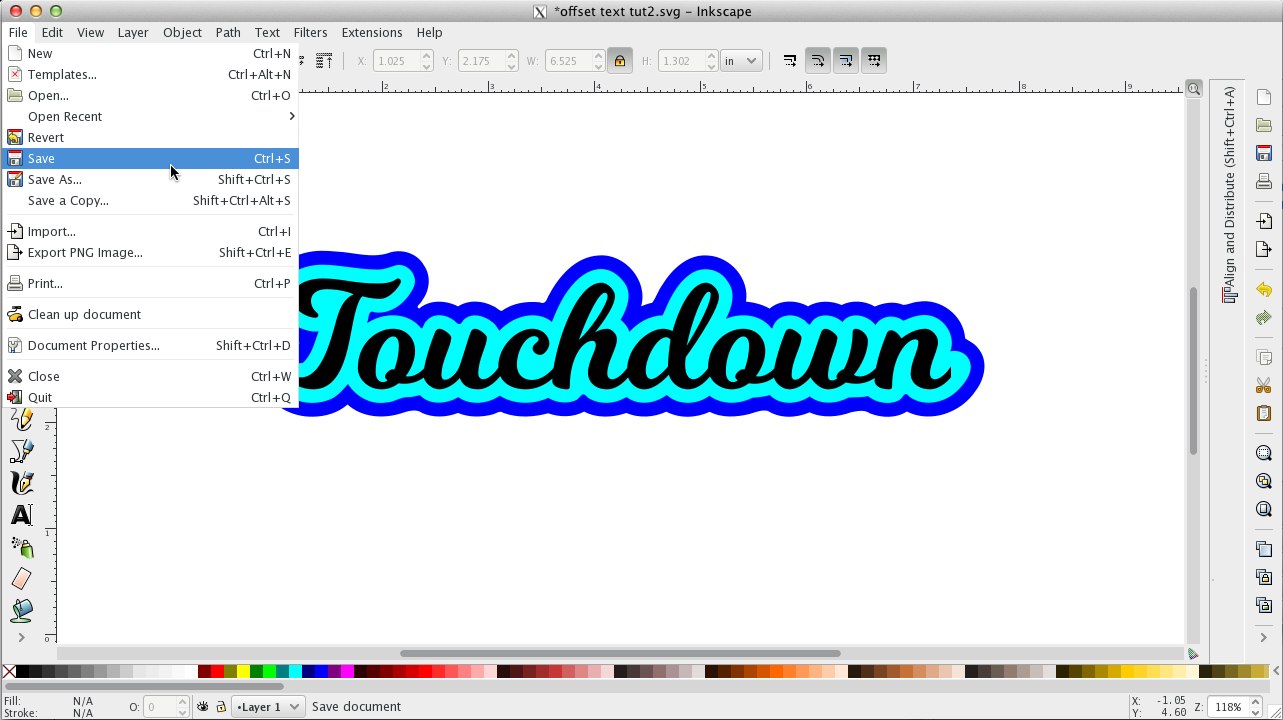
Save your document. (Inkscape saves natively as SVG)
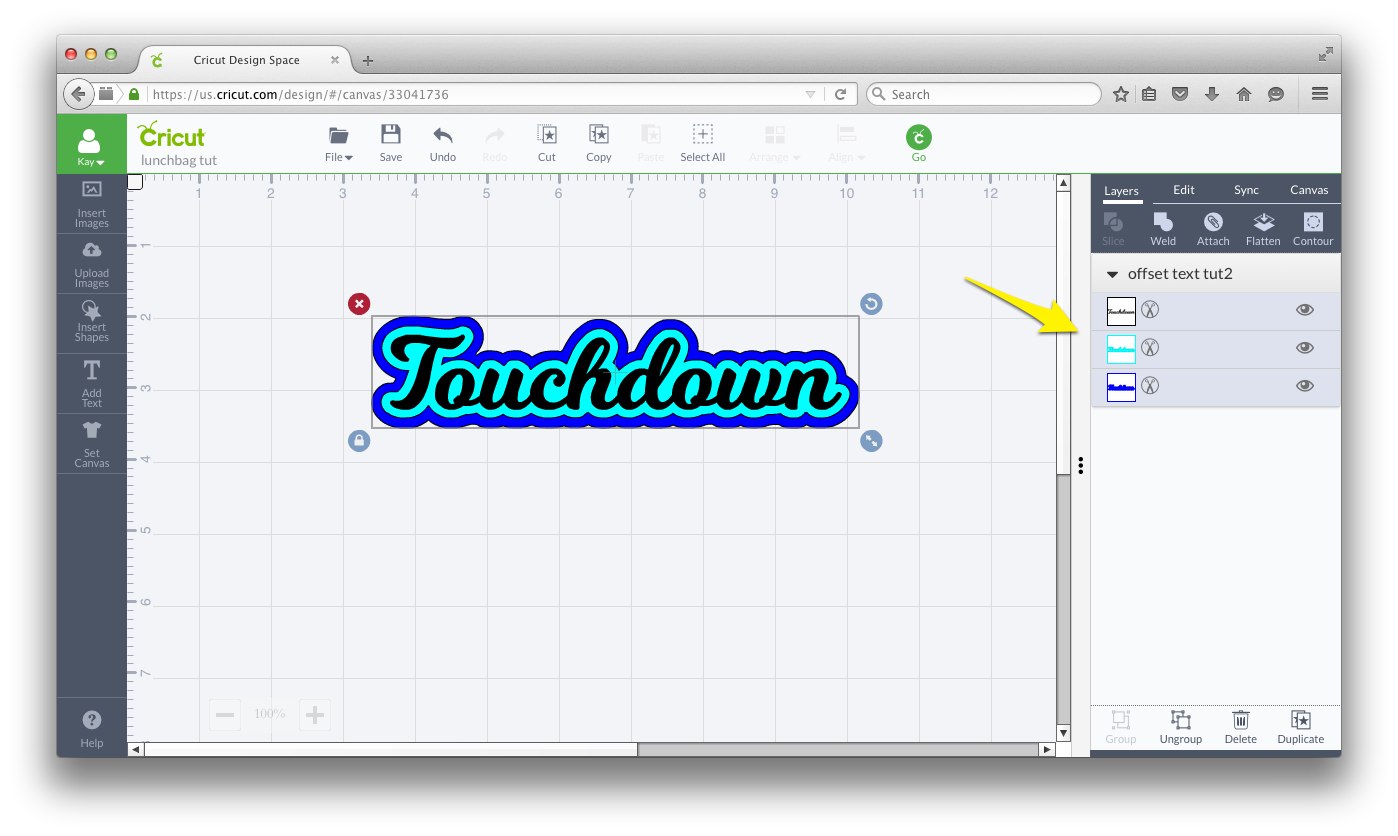
When you import your SVG into Cricut Design Space, each offset will have its own layer as shown below.
For more details on the Paint Bucket Tool, please see my intro video here

Thank you very much for sharing this tip. It is soooooo much easier than any other way I have tried. Great tutorial. Love Inkscape and there is so much more for me to discover.
Hello, I love this video! But, I am having trouble getting a line just an outline around my text…..it keeps filling the whole thing in. I have messed with the fill and stroke but can’t seem to get it right. Any help would be appreciated. Thanks, Linda
Your paths are likely correct, its just that your shape is filled and mine is not. Please watch the paint bucket basics video to learn how to set the defaults so they work like mine, or use the outline view so that the fill will not matter.
Thank you Kay, I shall give that a try because it is nice to see your offset lines before filling it.
Hi again! Would you be able to show me how you made the circle in your video? I can’t seem to get both the fill an stroke together. (two separate windows) I am usually good at this type of work……but I am ready to scream!
Hi Linda,
The easiest way is by using the color swatches at the bottom of the page like I do in the written steps and at about the 3 minute mark in the offset video. Click to select the fill color. Shift-click to select the stroke color. Or, you can go to View>Display Mode>Outline to work in Outline mode so that you can ignore fill and stroke altogether. I appreciate your tenacity! I will link you some videos on how to use Fill and Stroke panels as soon as my Internet is repaired, so you will know how to use that method as well.
Thank you so much Kay for your patience. I really want to learn more of Inkscape. I usually don’t have this much trouble so thanks for the extra instructions. Love your videos!! I shall go and give it another try! 🙂
Help! I wish I had the paint bucket tool! It looks so easy! I have a spray can in my version and no paint brush. 🙁 I want to separate layers from a file so that I can cut in DS. Every video I see on Youtube has the paint bucket. How do I work around this? Thank you any insight!
Every version has the paint bucket, but version .91 is missing the icon for the paint brush. The reset default button is still there, its just the icon that’s missing, or you can resent the defaults by typing in the correct values. If you don’t see the Paint Bucket, I’m guessing you have a smaller screen and have to use the continuation icon to find it. Another option is to press the “Y” key as that is the shortcut for the Paint Bucket.
Great tutorial, but it totally doesn’t work for me. I’ve been trying for 3 hours and cannot make it work.
Be sure you watch the basics video. Most issues are display issues because you are using different defaults than i am so it looks different.
Hey there!
I just want to say thank you! I’m creating a horse magazine for my twin girls as Christmas present and your tutorial helped me a lot to create the main logo
(similar to https://www.bibiundtina.de/themes/custom/martinshof/logo.svg)
Greetings from Germany,
Flo
I have followed your instructions for the last hour and I can’t get it to work. It fills solid and does not outline. Am I missing a step?
Most issues are display issues because you are using different fill and stroke colors than I am so it looks different, but is actually working fine. Be sure you watch the paint bucket basics video to see how I set the fill and stroke or work in outline mode so your fill and stroke won’t matter.
I have followed the video and can’t seem to get the outline around my text . What im i do
ing wrong?
Hi Yvette. Please check the comments below the video on Youtube to see if you find your specific issue there as I have answered several common issues. If you don’t see your answer, please use the contact form here on the blog to contact me with more specifics about what is happening.
Hi! Thank you for your video! Is there a way to help me find the menu for my paintbucket so that I can change the stroke, etc. I see yours on the right side of your screen in the Paint Bucket video…but I can’t find a way to get mine to appear…. Thanks
I have a prior video with much more detail here https://www.youtube.com/watch?v=LGsl_vrV3kw, or you can just work in outline mode where fill and stroke won’t matter.
Thank you so much! This was SO helpful! After a few issues with Inkscape (my own learning curve) I was able to get this down easily!
What do I need to set to get the stroke to say one? Mine says 0 and I can not figure out how to get it set!
go to the fill and stroke panel and turn the stroke on, then set to the width you want.