I want to share a quick Mac tip on how to install a bunch of fonts quickly, even when they are in different subfolders. This comes in handy when you purchase a font bundle, for instance. It’s really much quicker to do than to explain. I put together a 3 minute video, as well as written steps for those of you who prefer that. Of course this same process of using the Mac’s smart Finder windows is handy for lots of other sifting tasks as well, and once you get the hang of it, you will use it all the time.
1. Locate the bundle folder, usually in your Downloads folder. If it is zipped, double click on it and it will unzip automatically.

2. Double click to open the bundle folder and you will see a bunch of other folders.
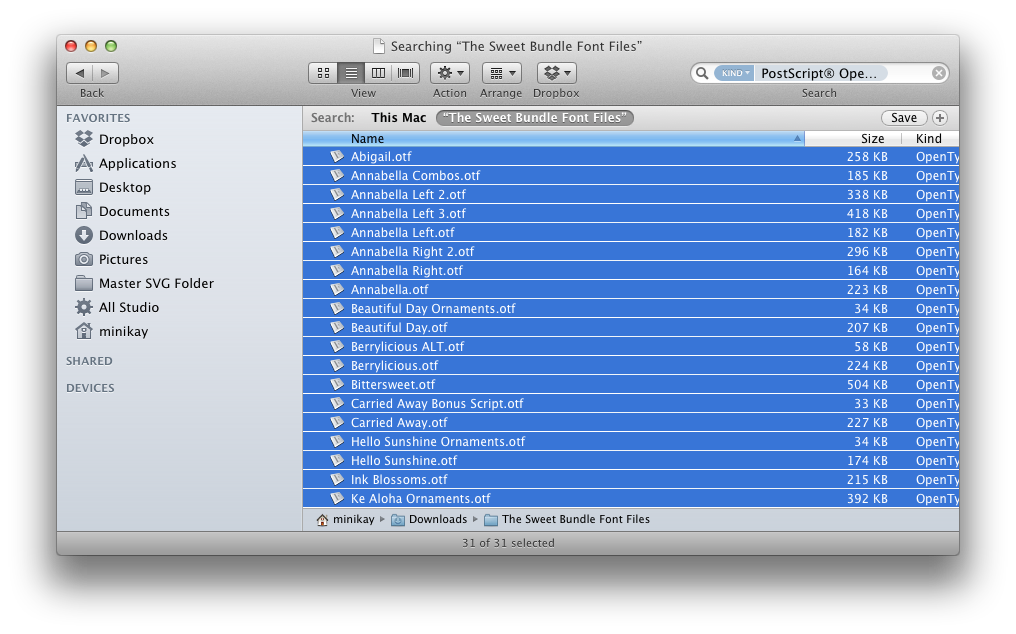
3. Type the letters “otf” into the search bar and select Postscript OpenType font from the menu that drops down. (I install OTF as a rule of thumb, but you can use TTF if you prefer.)
4. Click the name of the folder in the Search header.

5. Select any one font name, then type command-A to Select All. Tip: You can select individual fonts and preview them by pressing the space bar. If you don’t want to install all the fonts, you can command-click to select just the ones you want.
6. Open the Font Book application (its built in to your Mac, type Font Book in the Spotlight Search bar to find it quickly) and (optional) make a new Collection by clicking the plus button at the bottom left.
7. Bring the Finder window back to the front, or side by side, and drag and drop the selected fonts into the Collection of your choice or onto “All Fonts” at the top.
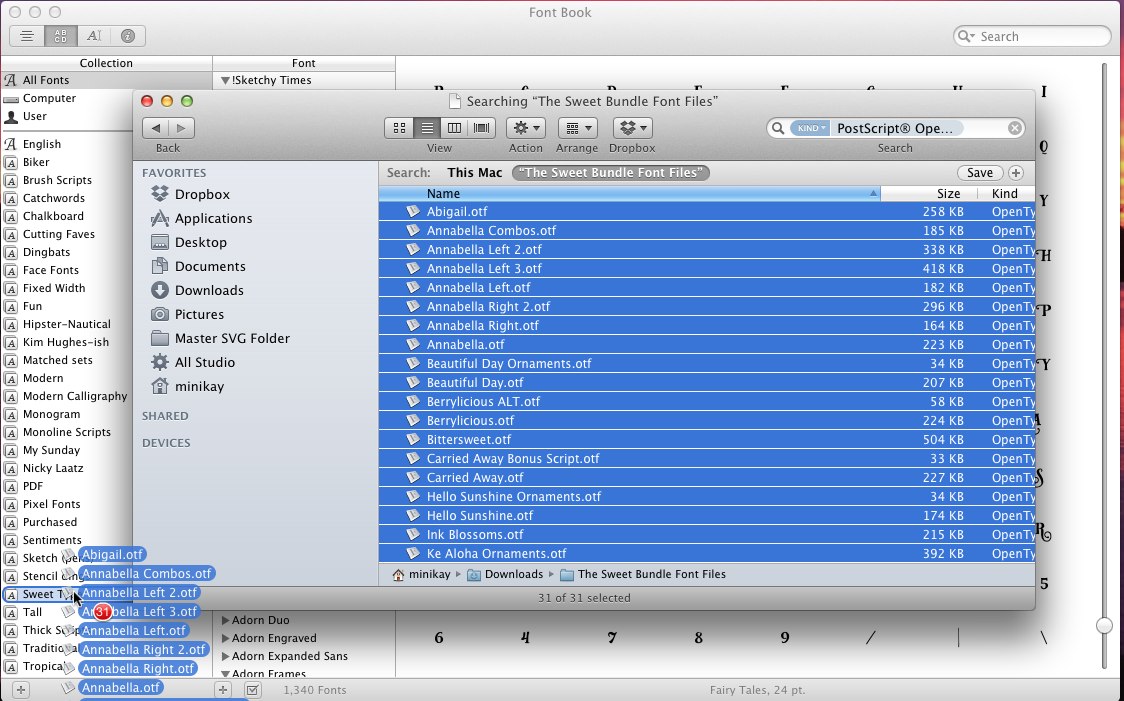
8. When you let go, a verification window may appear asking for your password. If so, enter it and click OK. Your fonts will be available to preview in Font Book under All Fonts or by clicking the collection you installed them into. They will also be available to all of your software applications the next time you open them.
Want some bundles to install?
The Sweet Type bundle is covered in this post and there’s another crafter friendly font bundle covered here and yet another holiday bundle reviewed here.

Thanks Kay.
Sent from my iPad
>
Always such good information! I have a question. How do I know which fonts will print fully colored in and will print out sentiment size in Design Space? I tried several times to print a sentiment on a birthday card with no success. The letters were not clear eleven woth several adjustments to size, spacing, etc. They looked different in layers than they printed out. Any suggestions?
Check out this post for information on thin fonts for writing filled in http://cleversomeday.wordpress.com/ttfs-for-diecutting#penfonts. As far as printing clearly at sentiment size I am guessing that the issue was the bleed that is applied for images being cut out. You need to flatten your sentiment to a shape, such as the card base or a rectangle, tag or label, so that the letters don’t cut out individually. This also turns the bleed off for them and results in a clear print. That said, resolution from Design Space is low, so small text isn’t going to look as nice as it does when printed from other programs.
Thanks. I checked out your other posts. I did flatten the text. It printed, it was just unreadable. The “s” ran together for example. I bought a finer marker and downloaded some of your suggested fonts. If it still doesn’t work, I will get a Chomas pen adapter. Thanks again.
I am confused about what you are asking and may have confused you with my answer, because printing and writing are two different things. The thin fonts and adapter are for writing. Flattening is for printing with a printer. If you want to write with a pen, use attach, not flatten. Also be aware that for writing to look good it takes the proper combination of font, paper, pen and size, so its not unusual to have to do a good bit of trial and error. A lot of people like the Pilot Precise V5 pens for fine tip writing.
Hi! First time on the site and so far I’m very appreciative and grateful. Question, do you have a post about uploading fonts from MAC to Silhouette?
Hi and Welcome! You don’t upload fonts to the Silhouette software any more. You simply install fonts on your Mac and then reopen Silh Studio and they will be there in the scrolling list for you when you have the text tool selected. If you are just installing one font, the simplest way is to double click the .otf file, then click the install button on the window that opens.
You are such a life saver. Thank you so much for all the work you do to help us. Hugs
This is brilliant. Thanks so much for such a great shortcut. I appreciate your generosity in sharing tips such as this with us! You ROCK!!!!
Thank you, AGAIN!