
A lot of times I don’t post things because I assume you already know them, and later find out you don’t. The hoopla over the PixScan mats has shown me that many of you don’t know what you can do with the mats and software you already have. So I am going to post this, in case you don’t want to wait on PixScan, and because this will help you understand how PixScan works. One of the benefits to the PixScan will be to cut out stamped images. But as you can see here, it’s already pretty easy to do that.
The pics below show what the video couldn’t, but won’t make any sense without this video.
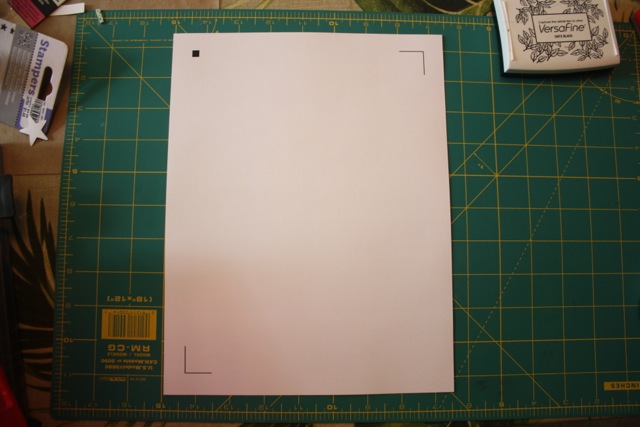
The blank stamping canvas has only registration marks
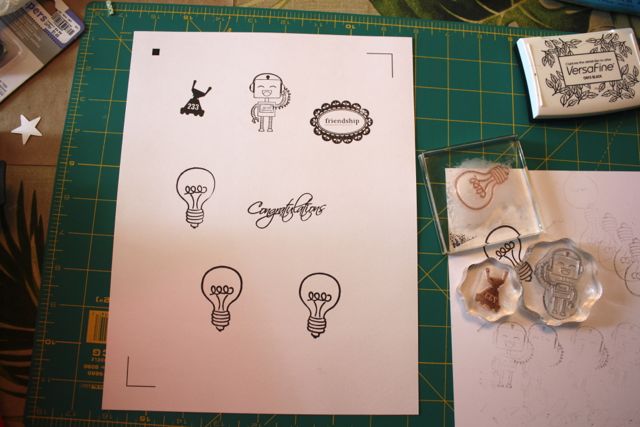
Fill it with stamped images. Tip: You can even emboss them, as long as its dark enough for the scanner to pick up.
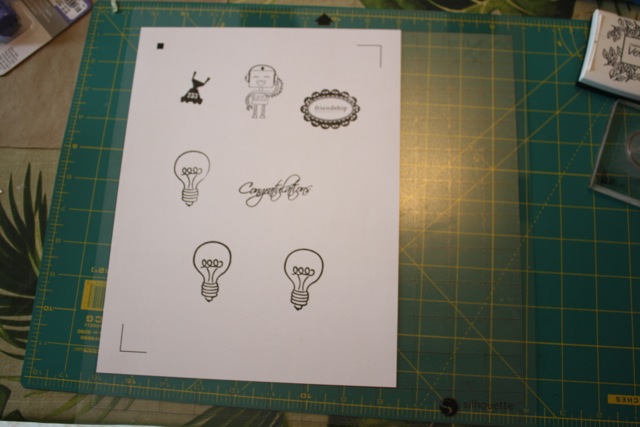
After scanning it and saving as a .jpg, load it on the mat
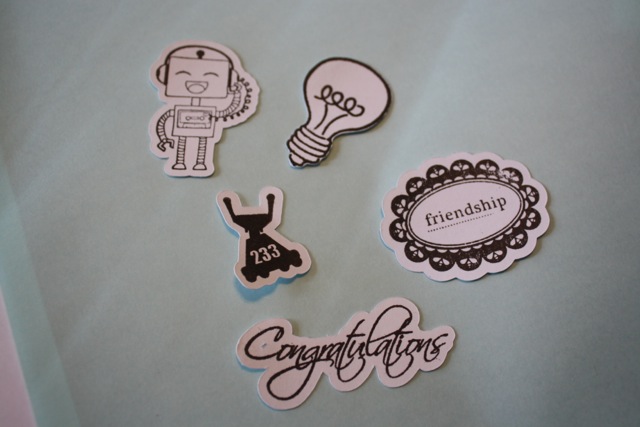
Using the cut file I prepared in the video (above), these were my results
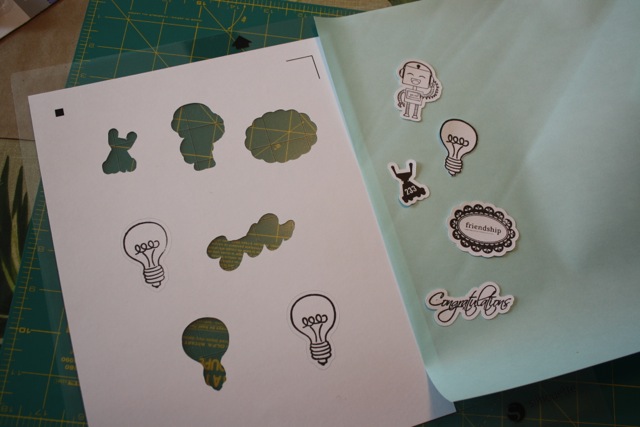
Even I had forgotten how well this technique works
PixScan works similar to this, except the marks are on the mat, and the mat is too big to scan so you either have to stitch together the images or use a photograph instead. You won’t get as clean a trace from the PixScan method, but you also won’t have to use a full sheet of your stamping paper, so there are tradeoffs.
There are other techniques we use that are even more similar to the PixScan technology, like when we use a “jig” to cut an 8-1/2 x 11 page using a 12 x 12 page with reg marks and a letter size cutout. But the more complicated our methods get, the more room for PixScan to improve upon it, though, so until we know how well PixScan works, we may as well lay aside our homebrew methods for a bit.
photo of the “jig” I use for cutting preprinted items of for printing and cutting a full 8.5 x 11.

Also, for tips on tracing stamped images to use with this technique or with your new PixScan mat, check out this earlier video

Kay,
When you stamp on paper then import into Silhouette, is the image the same size as the original? I was told PixScan will import the image in its original size. That’s what I’m looking forward to the most. P.S Love your blog and read it often.
Yes, if you scan and save as a jpg it already imports at the original size. It always has. You will see that demonstrated on both videos on this page.
I just took a quick look at your tutorial….. brilliant as always! Thanks so much for giving me something new to try out!
Kay, thank you for this wonderful tutorial. I, for one, have not upgraded to V3. Have you had a chance to look at the Pixscan updated version. Have all the bugs been worked out? I’m waiting on your okay before I upgrade.
Hi Kay! I’ve been using this method for quite some time as well. I had started a video tutorial for it a few months back, but my CraftRobo quit cutting properly and I couldn’t finish it. I’m glad you made yours so everyone can see how easy it is.
I’m always amazed at what you come up with ..and all your tips and tricks.
I downloaded the upgrade as I wanted to play with the PIXscan feature. I’ve found so far that in this version the layers feature is much improved but the work around in the other version if you really needed it was to use cut by colour so just wanted to see if it worked! I used to use select + Ctrl and drag to get a copy or select + Alt and drag now it’s changed to just Alt and drag; must remember that otherwise if I use Ctrl and drag I get a pencil !!
I opened the PIx scan mat, made a screen shot and then in my graphics program made myself a life size mat out of thick card. stamped an image, use temp adhesive to adhere it to the mat and put the whole lot in the scanner. I used the ‘get pixscan image’ function and it put my image on the right place on the mat! Obviously you only need to be a bit out with the reg marks to not cut and the machine didn’t like the mat ( quite rightly!!) but the head did move!! You can register manually using the arrow keys provided. So – I traced my stamped image and saved it for later. Now I see how it works I’m satisfied and will wait patiently .. sort of ..for the mats to arrive in UK about middle of August. It’s very much akin to the Brother scan n cut system and a lot relies on contrast. As you’ve shown there are other ways of tracing /cutting but it’s interesting. For now I’ll use the scanner – getting the file from the phone to the pc I’ll probably go through Dropbox until I find a quicker way.
For some reason, this YouTube video has no audio. This happens occasionally with some videos, and I never know why. My audio worked with every other video I tried, but not yours. I can see by the comments that this wasn’t a problem with your other viewers. Can you tell me why this happens and what I can do about it? I really wanted to see your video on stamp & cut.
PS – Your emails and videos are always so helpful. Thank you! Elyse
Oh my this worked! I was just off a hair. For some reason I couldn’t get the registration marks to line up, but close! Thank you.
Dania, Sometimes you have to rotate slightly, in addition to adjusting the size a smidge. Glad it worked for you anyway.
wonderful video, can you make a video showing how to color and put in patterned paper?
Lois I had hand coloring in mind here but I covered coloring/filling a digital image in Tracing without Tears Part 3 here on my blog or on Youtube.
Hi Kay, I have a Silhouette SD, but have updated to latest designer edition. Can I use the PixScan? How do you obtain one – – – from Silhouette or?
Sorry, Kathy, you can not use PixScan with an SD.
I just tried my first scan and cut using my silhouette this morning. I made a few mistakes and had to repeat the process a few times, but ultimately I was successful. Thank you for your videos. You saved me a lot of money and broadened my capability in card making and paper arts. I can now cut out all my stamped images, i’m so excited. I can’t wait to show my friend. Thanks again!.
I can tell by all the comments that not everyone has the same problem as I do – no audio on this video. I have audio on the videos before and after this one – and of course this is the one I really, really want to see & hear. Any help you can give me would be so appreciated. Thanks, Elyse
After watching your video several times since you posted it and thinking about it for weeks, I finally tried to duplicate. It worked perfectly!!! The very first time!!! Thank you so much for this great tip. I will be making cut files now for ALL my stamps. You are very kind to share your knowledge. Thanks again.
Thank you for all of the useful tips i have learned from your site. I have a question on two things in the video. First was how did you do print preview in Silhouette? I could not see what you clicked in at the bottom of the screen, and Second what is that house icon at the beginning of the icons on the right side? I have designer addition and do not have that.
Thanks
Danell,
I have a Mac, so print preview via Print to PDF is built in. If your printer software does not have it, you can add a virtual printer such as PDF Creator or Bullzip to add that capability to your Windows system. The house icon is only in the basic edition and brings up a home panel with the rest of the buttons on it. So nothing is missing from the Designer Edition, but there wasn’t room or need for the Home button.
Thanks! I’ve been going at it in a way more complicated route.
Kay, thanks again for all your toturials! I have the Picscan, but still do it your way. Also nice to be able to combine my stamps with the Silhouette.
I just want to say thank you!!! I have wondered for a long time if this was possible and if so how difficult it would be. I have several stamps that have matching dies and even with the misti tool –which I love, I still would get the stamped image askew. So, I needed some images cut out that I didn’t have the dies for and tried this. I worked so beautifully. Now I know that I don’t need to spend my money on the matching dies.