
A lot of times I don’t post things because I assume you already know them, and later find out you don’t. The hoopla over the PixScan mats has shown me that many of you don’t know what you can do with the mats and software you already have. So I am going to post this, in case you don’t want to wait on PixScan, and because this will help you understand how PixScan works. One of the benefits to the PixScan will be to cut out stamped images. But as you can see here, it’s already pretty easy to do that.
The pics below show what the video couldn’t, but won’t make any sense without this video.
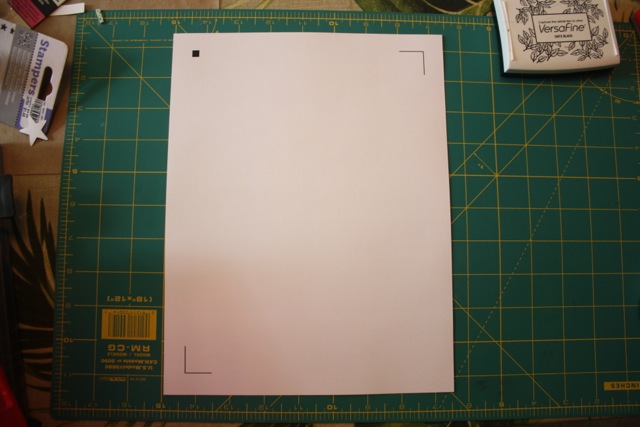
The blank stamping canvas has only registration marks
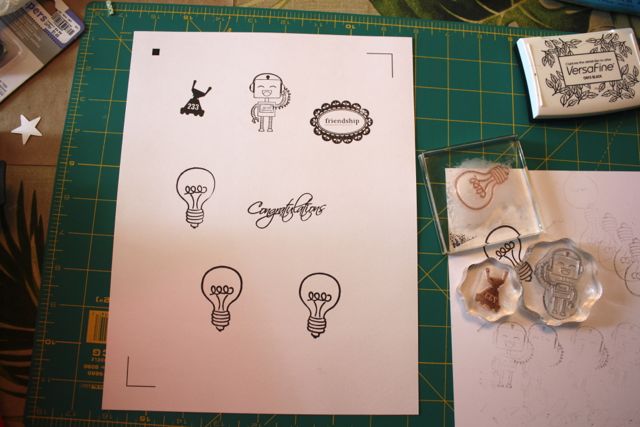
Fill it with stamped images. Tip: You can even emboss them, as long as its dark enough for the scanner to pick up.
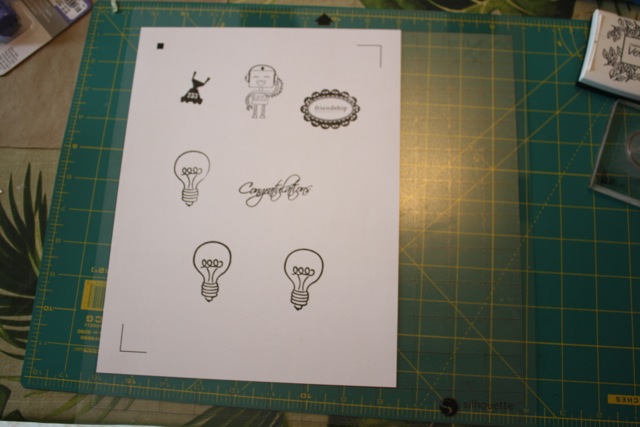
After scanning it and saving as a .jpg, load it on the mat
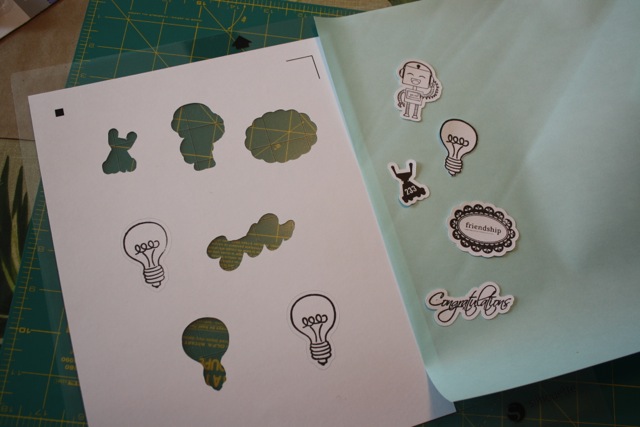
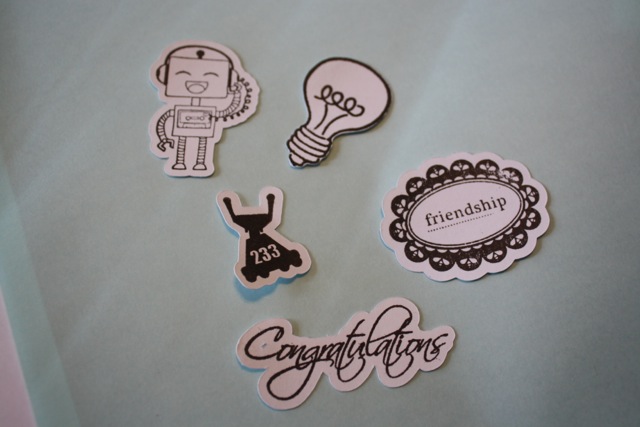
Using the cut file I prepared in the video (above), these were my results
Even I had forgotten how well this technique works
PixScan works similar to this, except the marks are on the mat, and the mat is too big to scan so you either have to stitch together the images or use a photograph instead. You won’t get as clean a trace from the PixScan method, but you also won’t have to use a full sheet of your stamping paper, so there are tradeoffs.
There are other techniques we use that are even more similar to the PixScan technology, like when we use a “jig” to cut an 8-1/2 x 11 page using a 12 x 12 page with reg marks and a letter size cutout. But the more complicated our methods get, the more room for PixScan to improve upon it, though, so until we know how well PixScan works, we may as well lay aside our homebrew methods for a bit.
photo of the “jig” I use for cutting preprinted items of for printing and cutting a full 8.5 x 11.
Also, for tips on tracing stamped images to use with this technique or with your new PixScan mat, check out this earlier video


great tutorial- each step is so clear and having both the photo step outs and the video is a plus. As a teacher I really appreciate how much time you put into this for the community.
Thanks
Thanks for this tutorial. I can do these cuts and keep V2. Yay! I wish I could work as fast as you! Thanks again for all of your tutorials and sharing your knowledge.
Kay, I forgot to ask if these instructions (e.g., saving a “jpeg”) are the same for a Mac as for a PC? Also, I assume the “jig” is placed horizontally (e.g., landscape) on the mat for a reason–thought P&C marks had to be placed vertically. Thanks again.
Auntie,
I rotated the photo so you can see it’s positioned normally. Thanks for pointing out the confusion so I could fix it. Yes the instructions are the same for Mac and PC.
Thanks for the clarification.
I was excited when I saw the mat, but I am already doing that without one. Just like you showed in the first video. This new video doesn’t have a sound for me. Will check on my desktop in a bit. Thank you!
Thank you so much, Kay. There is so much for me to learn re the Cameo & software. I’ve looked at most of your videos and read and re-read your blog, but I guess I’m just dense. LOL I jumped right on the PicScan because it looked so easy. I appreciate all that you do to help us all. Pennie
Thanks again, Kay, for great instructions. You make it so easy!
Thank you for the information. The pix-scan looks cool but we can do it without it. Yay! I now need to practice my scanning skills. Lol
This is the clearest set of instructions I have seen yet for how to trace an image. Thank you so much. I would love to understand exactly what High Pass and Low Pass are and what I am doing when I turn them on or off. Also what exactly is Threshold.
I always learn something from your blog. Thanks again.
Dottie,
I answer all those questions in my Tracing without Tears series. Part 2 covers Threshold and Part 5 covers the other controls. You can find them here on this blog or on Youtube.
I have been doing a slightly different version of this. I stamp an image and then scan it and import to my Cameo virtual mat. I then trace it like you do and make an offset, too. I save the offset in my library to use whenever I want for that particular rubber stamp image.
I cut the offset image out of whatever paper I want and before I take it off the mat I use a Stampamajig to stamp my rubber stamp image on the paper. That way I can use whatever inks that I want and can even wet emboss the image with embossing powder. Works great for me.
Yes, Chris, I had already covered the “Cut and Stamp” method in the earlier video. I’ve now posted 3 approaches so there should be something that will work for every situation and preference. And I also should have mentioned that you can go ahead and emboss the stamped images in this method before scanning, too. Thanks for bringing that up.
Excellent tutorial! Following your instructions, I was able to scan and cut some fairly intricate stamped images. I’ll be using this technique often. And I don’t’ need to upgrade to version 3. Yay!
Thank you Kay, that was a great tutorial. I want to try this technique out.
great tutorial, thank you
I was so excited to see the pix scan mat – until I read this blog and realized how easy this already was for me to do! I don’t use special stamping paper, just smooth card stock, so it wouldn’t kill me to spare a sheet to cut out for a project. This idea is perfect for making multiple cards at once… Just stamp everything on the page.
I wonder how the new software update will effect stamping and scanning – do you think it will enhance the method you do?
I am anxious to see what the new software does, but it would be hard to make this process any easier. When it comes to cutting things out that are preprinted (like an image from wrapping paper, for instance) there’s a lot of room for enhancement, so that’s where I expect PixScan to be helpful.
Thank you so much for sharing this, Kay. I shared it with my local Silhouette group :-).
I have no idea what the Pix Scan is, I did love your video and really appreciate all the help, I sure need it. I have so much on my plate, it seems the Cameo gets pushed to the back burner and I only use it to cut simple things with the basic tools…I don’t know how to use most of the areas of the software. I became very proficient in Corel Paint Shop Pro a few years ago, even did tutorials, so if I can figure that out, I hope Silhouette will come to me eventually, too. Thank you, Kay.
Debbie 🙂
Do you have information on how you use your “jig” pictured near the bottom of the post?
One way … Put the item to be cut out in the open portion of the jig. Snap photo with camera phone or tablet. Run photo through a scanner app to correct for angles, etc. Bring photo into Studio. Resize, rotate and reposition image until the marks match up. Trace for cut lines. Cut.
Thank you!!
Thank you very much. It means that it is not neccessary to buy the Pix Scan Mat?
I love your jig and can see so many uses for it! I really like the idea of being able to cut full 8.5×11 sheets without the use of registration marks. I see this as being more useful than the pic-scan method, since the file has potential to be duplicated and shared.
What is the purpose for the target marks in the middle?
Kristy, the marks help you line up the corrected photo on the virtual mat for placement. If you are using a design from inside Silh Studio you don’t need them.
Kristy, the marks help you line up the corrected photo on the virtual mat for placement. If you are using a design from inside Silh Studio you don’t need them.
Thanks so much for the tutorial! Your instructions are always clear and understandable! I’ll have to give this a try before diving into the Pix Scan. Thanks again!
I love your jig! But it looks like it was printed in 12×12 paper. Anyway to do that without a wide format printer? (I love your tutorials!)
If you do not have a wide format printer, you can use your Cameo to draw the marks with a pen instead!
Kay, thank you for sharing your great ideas! U have a question, in the SIL YouTube video they showed cutting images from patterned paper – I seem to remember a red stripe background with a bike on top of the stripes. The bike image was traced & cut. Any clues how you would do this without PixScan? I have ordered the mat but I am still reluctant to use the new software updates 🙂 I am still using version 2.9.45d and paranoid of the updates since then!
Bernadette,
I noticed that, too, and doubt that you will be able to do that with PixScan either. My guess is that marketing license was taken with that video, but we will have to wait and see if V3.1 does have new tracing capabilities.
Kay, when they “traced” the bike on the striped paper – seemed like they went to the bottom right side and clicked on something – wonder if it “erases” background? Your thoughts? It would be fab to trace patterned paper and cut out sections!
I’m pretty sure this has been manually traced. When I zoomed in on screen shots from the video I could see that it’s not the background that’s a problem because the stripes stop before they get to the bike. What is a problem are the bike parts that are delineated only by “imaginary” lines. There is no software that can trace an imaginary line. Only a human can do that.
I’m glad you posted this. I was considering updating, but now I know I can wait. Your steps make it look so easy. I need to give this a try. Thanks so much for everything you do for us with our Silhouette machines!
Thanks Kay for this great video. I am looking forward to checking out PixScan, but until then, this will do the job. LOVE your tutorials!
Thank you for such a cool tutorial on this, very understandable. I look forward to giving this a try this week 🙂
I knew I could scan my stamp and cut out the outline, but then lining up my wooden and rubber stamps to stamp onto the right cut out area was next to impossible. I never realized that I could scan the whole page with the registration marks to stamp before I cut. I always wanted to ask if there was a way to stamp and then cut, but I never did.
Thanks for all your help and your work explaining so much stuff to all of us whose brains don’t work the way yours does! Tracing Without Tears and all of your other videos and your blog have been priceless!! Many Hugs.
Charli